How to Grow Corn for Beginners
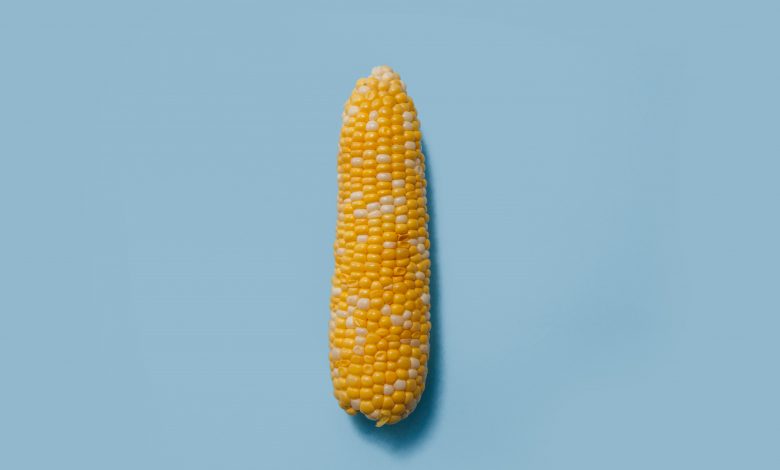
Growing your corn is much easier than you think! Of course, if you want to harvest plump, juicy corn, you need to know how to take care of your corn patch. From planting, to care and harvesting, we have put together the most comprehensive guide to growing corn.
The first thing you need to decide is what type of corn you want to grow. And it is tough to choose without knowing your options, right? There are three main types of corn:
- Standard corn
- Sugary enhanced corn
- Super sweet corn
The Different Types Of Corn

Standard Corn
Standard corn is one of the oldest types of corn and is probably the type your grandmother grew. This standard type of corn has been cultivated for hundreds of years, so if you want to stick with traditional, this is the type to plant. You can plant standard corn in cold soil as low as 55 degrees Fahrenheit. There are four main varieties of standard corn:
- Silver Queen: This corn is known to be very tender and sweet and has snow-white kernels. The great thing about this type of corn is that you can store it for days and still get the same rich taste. Silver queen corn is also able to resist bacterial wilt, which is undoubtedly a big plus.
- Golden Cross Bantam: This variety is known for its large, yellow kernels, which makes it tough to miss. This type of corn is very prolific, and a stalk can grow up to six feet.
- Jubilee: The jubilee corn has large ears of up to nine inches long with stalks that can reach seven feet. Its kernels are yellow and ideal for eating or processing.
- Butter and sugar: This corn has bicolor kernels of white and yellow. It, too, can resist bacterial wilt and leaf blight.
Sugary Enhanced Corn
This is a hybrid variety designed to maintain its distinct flavor for up to three days after harvest. This gives you a short three-day harvesting window. The advantage of this corn variety is that it requires less babysitting and is ideal for warmer soil. Sugary-sweet corn also has four types, namely:
- Kandy: This takes 89 days to grow and has sweet tender golden yellow kernels. Kandy corn is ideal for freezing and canning. It also tends to be quite hardy and adaptable to different climates.
- Concord: Concord corn is also referred to as Moore’s Early Concord. It is a good option if you are looking for a shorter stock variety, as the concord corn only grows up to five feet tall.
- How Sweet it Is: The variety can resist most diseases and is very adaptable. Each six foot stalk can produce two ears per stem with white kernels. The flavor of this type of corn holds well in storage.
- Breeder’s Choice: This type is extra creamy, sweet, and tender and can stay that way for up to two weeks. The stalks can bear two ears and grow up to seven feet.
Supersweet Corn
This variant is another hybrid and is the sweetest among the three. Like sugary enhanced varieties, supersweet corn has a harvest window of three days. The sweetness of this variety comes at a price – it requires a lot of care and has particular needs. For instance, the soil needs to be at a temperature of 65 degrees Fahrenheit or more, which may require the use of cover beds with black plastic. Supersweet corn varieties include:
- Sweetie: This variety is tender-crisp and has deep yellow kernels. Stalks can grow up to six feet with seven to eight inch long ears. Sweetie corn has 30 percent fewer calories than regular corn.
- Early Xtra Sweet: An All-American selection type, this corn resists most diseases. The golden yellow kernels are small and tender and, of course, very sweet.
- Butterfruit Original Early: This corn has a savory flavor with tightly packed ears. Stalks can grow up to five feet tall and mature earlier than other varieties.
- Illini Xtra Sweet: This variety of super sweet corn is ideal for freezing. The stalks can grow up to six feet tall with sweet, golden yellow kernels.
Aside from these three types of corn, you could also plant baby corn or popcorn, but for now, let’s just stick with the three most popular types mentioned above.

Tips for Planting Corn
The first thing you should know about corn is that it is susceptible to frost. So before you get your shovel out, look carefully for any signs of cold and postpone planting if frost is in the forecast.
Another essential thing to note about planting corn is it does not do well with transplanting. So if you need to start corn indoors, make sure you use biodegradable pots, so you don’t disturb the roots while transplanting.
The ideal time to plant corn is when the soil has reached 65 degrees Fahrenheit. This is usually only possible about two to three weeks after the last frost in spring. To help heat the soil faster, you can use black plastic to cover the ground in advance to pre-warm it.
Depending on the variety of corn and the average temperature, your crop will need about 60 to 100 days without any frost to reach maturity. You can expect corn seeds to start germinating in ten to fourteen days.
In terms of soil, make sure the soil you choose is well-drained but can hold back some water. Corn uses a lot of water, so sufficient moisture in the soil is necessary. If you are planting corn in the fall, make sure to work in aged manure or compost before planting.
Preparing a Planting site
It is crucial to plant your seeds between 1 to 1.5 inches deep. Similarly, you will want to make sure your corn is at least two to four inches apart. During pollination, it is best to plant your corn in square or block patterns, as opposed to one or two long rows.
This will ensure that your corn will be full of kernels and delicious. If you are not a fan of block patterns, then you can also try the mounding option. This requires you to plant a few corn seeds on raised mounds. This will also ensure you have proper pollination and full-kernelled corn.
As your corn grows to about six inches in height, you will want to thin your corn patch. This will ensure that your corn has plenty of room to grow. The danger of planting corn too close together is it will likely produce fewer cobs of corn and require more attention. For dwarf varieties, thin them so they are 12 to 18 inches apart. For taller varieties, make sure your corn stalks are at least 18 to 24 inches apart.
Watering and Feeding Your Corn
Regularly watering your corn and keeping the soil damp is crucial for the success of your harvest. Since corn grows best in warmer climates, it requires a constant amount of water to avoid drying up. When tassels start appearing, be careful not to water overhead, as this can hinder pollination and affect the yield. As the stalks reach ten inches in height, add nitrogen to the soil through composting. Repeat this process when the stems reach 18 inches and again as the tassels being to form.

General Corn Care
Your battle with hungry birds will be a constant struggle. The climax of the fight will be just as your corn tassels, so be vigilant. One trick for protecting your corn from these aerial attacks is to cover the ears with paper bags after pollination.
Another issue you need to address is the fierce competition for soil nutrients. Since corn is a shallow-rooted crop, it is best to weed early to avoid overcrowding. Overcrowding results in poorly developed kernels, which leads to a low yield. If you notice the stalks turning purple, it is a sign that they are not winning the nutrient battle. You may need to call in reinforcements by adding phosphorus to the soil.
Corn Pests and Diseases
Flea beetles, earworms, corn borers, and wireworms are some of the pests you need to look out for. When you make your regular rounds, keep an eye out for these pests and be sure to remove any unwanted visitors. Corn borers tend to tunnel into the stalks and ears to feed, so handpicking them is the best form of control.
As for corn earworms, you can put a small amount of mineral oil on the tip of the ear to suffocate them. Another natural prevention is to keep your corn area free from debris so these pests have no place to live. If this weren’t enough, you would undoubtedly begin seeing rodents and raccoons visiting your garden. You will want to leave traps (live traps are preferable) or put up a fence to protect your crops.
Corn diseases include smut and Stewart’s wilt. If you notice your kernels turning grey or black or if your corn kernels start swelling, it may be because of smut. The only solution is to destroy the infected plants and leave the area unplanted for a couple of years before re-planting, as smut spores can only survive for this amount of time.
Stewart’s wilt is a bacterial disease spread by pests, such as the flea beetle. The condition causes leaves to turn yellow and stunts plant growth. You can avoid this bacteria by planting resistant varieties, like some of the standard corn varieties mentioned above.

10 Common Corn Problems And Solutions
As a first-time corn grower, you are bound to face a few hiccups in your journey, but don’t worry – everyone passes through this phase. The good news is you don’t have to go through it alone. We have you covered. Here is a list to help you troubleshoot possible problems and get your crop back on track.
Top of leaves and stalks have reddish-brown blisters
This disease is also called “rust” and is caused by a fungus that grows on the plant. You can avoid this by planting rust-resistant varieties and avoiding overhead irrigation. If you already have this symptom, prune away infested leaves.
Corn does not germinate after planting
This problem is because you planted when the soil is still cold. Try planting again when the soil is warmer and make sure your soil is well-drained by adding organic matter.
Seedlings are uprooted
Birds are the culprit of this, and the solution may be as easy as covering seedlings with a bird block until they are well-established.
Stalks fall over
There are two possible reasons for stalks falling over. First, your soil may have too much nitrogen, which can leave stems weak. Do a soil test and adjust fertilizers. Another more common cause is the European corn borer, which tunnels through stems and weakens them. A simple garden cleanup solution can get rid of this problem.
Leaves have large holes
Various beetles, grasshoppers, and worms can eat away corn leaves. Although the loss of a small amount of leaf tissue will not drastically affect yield, they can make your corn look ugly. If you find any of these pests, handpick them. You can also use commercial insect traps to get rid of these pests.
Ears are only partly filled, and silks are chewed short
This problem is often caused by beetles, such as the Japanese beetle, Earwigs, or the corn rootworm beetle. They all like feeding on the corn silk and will prevent pollination. During the pollination period, check ears daily and remove any beetles you find. You can also use a natural pest repellant of hot pepper and garlic to repel these insects. Keeping your garden free from debris and weeds will also help to keep these worms at bay.
Leaves have grayish oval spots
Southern corn leaf blight and northern corn leaf blight can cause leaves to have oval spots. These fungi love wet conditions, so keeping the soil well-drained is the best solution. You can also add aged compost or organic material to help with this.
Edges of leaves roll inwards
This is an indication that the soil lacks moisture. When ears start to form and mature, corn needs a lot of water. During this period, make sure to water deeply up to two to three hours at a time. You can also use organic mulch on a planting bed to help retain the moisture.
Seedlings are cut off near the soil surface
Grubs and cutworms can cause this type of damage. You will likely find them at night feeding at the base of your plants. Handpick these pests and get rid of them as soon as you can. Once again, keeping your garden free from debris will help reduce the number of grubs or cutworms.
Kernels appear pink in color with brown lesions on stalks
This is often caused by rotting, which in turn can be triggered by fungi. Remove all the plants that are showing these symptoms and make an effort to keep your garden clean. Maintaining well-drained soil and adding aged compost to beds can help reduce fungi.

How to Increase Your Corn Yield
First time corn growers often complain of the same problem – ears of corn have missing kernels. This problem is a sign that pollination didn’t go well. To make sure your kernels are full and you get a good yield, plant corn in a block instead of rows. Planting in blocks aids pollination, which is critical in getting a good crop.
Here’s why.
The wind pollinates corn. The female flower is referred to as the silk, which are the fine strands that cover each ear. The male flower is the tassel that forms at the top of the stalk. Each potential kernel is connected to silk, so pollen must drop down from the tassel to the silk to help the kernels develop correctly. So if you see gaps in the ear of corn, not all the silks were pollinated. This is where block planting comes in handy. Planting corn in blocks of four to six rows enables the plants to fertilize easier.
Planting in one or two long rows makes pollination much more difficult. Spacing plants about six to eight inches apart ensures pollen falls from the tassels to the silks instead of getting wasted on the ground.
Another option to increase the chances of pollination is planting in hills that are in a block or square formation. You can plant three or four stalks per hill and arrange mounds to be three feet apart.
You can even manually pollinate silks by shaking the tassel on each stalk daily for several days. This is a great idea to supplement the natural wind and ensure every tassel gets a little bit of pollen.
A word of caution when planting different varieties of corn – plant different varieties at least two weeks apart. This reduces the risk of cross-pollination and ensures the taste of each type remains pure.
Harvesting Corn
After all your hard work, harvest time has finally arrived. Before you rush in to pick your homegrown corn, here are some things to remember. First, make sure the corn is ready to pick. One way to determine whether you can start harvesting is to open the husk and pierce a kernel with your fingertips. If you see a white liquid splash out, you are good to go. Remember that ears on the same stalk do not ripen at the same time, so you may need to harvest them a few days apart.
Another way to check if you can pick your corn is to look at the silks. Completely dry silk or a yellow or faded green sheath means that you are a little too late for harvesting.
On a side note: The proper process to pick corn is to grab the ear and twist it down, so no tools are required!

Corn is one of the many crops you can never go wrong with. You can always do with fresh corn in your garden, and the great thing is you can preserve corn for future use. Corn is one of the best crops for aspiring gardeners. Once you get through one season, you will likely get a better yield the next time around.
If you face any challenges along the way, just turn to our list of problems to help you figure things out. When things get rough, focus on the satisfaction you will get when you serve your family, your first harvest straight from your garden!
