4 Vegetables to Grow Indoors
The price for fresh produce is on the rise, making it even harder to maintain a healthy diet. Many times have we visited our local marketplace to purchase fresh fruits and vegetables only to find less-than-fresh products at premium prices. Indoor gardens are quickly becoming a popular, affordable alternative to buying overpriced, genetically modified produce from grocery stores.
There are many benefits to growing your food indoors such as less exposure to pesticides and genetically modified foods. Indoor gardens are also ideal for those living zones where extreme weather prevents traditional growing and harvesting seasons. For urban dwellers, certain veggies can be grown in pots on balconies and patios. Whatever your living situation, it is possible to have a healthy garden indoors and outdoors. Let’s take a look at a few vegetables that are perfect for an indoor garden.

Carrots
Carrots provide us with a plethora of important vitamins and minerals needed for eyes, immune system, and overall health. They are also fairly easy to grow in pots because they grow deep down in the dirt and don’t require a lot of room outside of the pot to grow big. Follow these steps to grow delicious, organic indoor carrots.
- To get started, you will need a fairly large pot that is at least one foot in diameter and depth. Your pot should also have drainage holes at the bottom to prevent from flooding while watering.
- Fill the pot with potting soil, leaving an inch or two at the top of the pot for the top layer of soil. Water generously, but don’t drown.
- Plant the carrot seeds one inch apart. If you have multiple rows, be sure each row is at least six inches apart. Once seeds have been placed, cover them gently with a thin layer of soil. Lightly sprinkle the top layer with water. The soil should be moist, not soggy or soaked.
- Carrots usually germinate between 14 and 21 days as long as you keep the seedbed moist. Carrots love sunlight so try to keep them on a balcony, patio, or underneath adequate UV lighting for at least 10-12 hours per day.
- Like most vegetables, you will want to thin your carrots at least twice during growing stages. When your seedlings are about three inches tall and about half-way to maturity, snip the heads off of the weakest or most crowded areas. Pull carrots only if you can do so without disturbing the roots of others nearby.
- Baby carrots can be harvested in as little as 30 days, whereas larger carrots may take between two and three months to reach maturity.
The carrots are ready to be harvested once the orange crowns have sprouted ¾ inch out of the soil. Grasp the carrot tightly at the root, and pull straight up. If it is too difficult to pull or the soil is too hard, try watering the carrots and waiting 45 minutes to an hour and try again. Allow cleaned carrots to dry before properly storing them in the refrigerator.

Lettuce
Lettuce is another great vegetable that provides many health benefits. Lettuce is a great source of vitamin C, fiber, and Omega fatty acids to promote a healthy digestive and immune system. It is also a pretty easy plant to grow, as it requires little more than intense sunlight and water. By growing your own lettuce, you’ll never be too far from a delicious and nutritious salad. Keep these tips in mind to grow lettuce indoors:
- When choosing the type of lettuce you wish to grow, try for loose leaf varieties such as Romaine, Black-Seeded Simpson, Oak Leaf, and Lollo Rosso. The types need significantly less space and mature a lot faster than head varieties.
- It is also important to find a location that gets at least 12 hours of intense sunlight. If you don’t have access to patio or balcony, a grow light could come in handy.
- The best container for growing lettuce will be one that is shallow with good drainage.
- Use a soil that is best for starting seeds. Potting soils may be too rough or coarse.
- Plant the seeds as you would any others, spacing them two to three inches apart and just under an inch deep.
- If you choose to supplement your plant’s growth, use a liquid fertilizer that is formulated for vegetables. Try organic feed options like compost tea or bone meal to boost growth and yield without potentially harmful chemicals.
Depending on the type of lettuce you are growing, your plants should be ready to be harvested when they are about four to six inches tall. This usually takes between one to two months. Unlike other vegetables, you don’t have to harvest the whole plant at one time. Cut and harvest leaves as you need, starting on the outside and working your way to the core.

Peppers
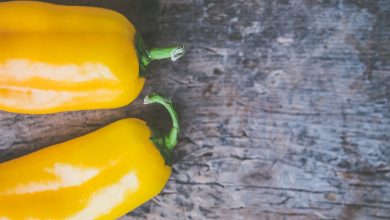
Because peppers have seeds, they are technically a fruit. However, these culinary vegetables also make great indoor gardens. Peppers are packed with nutrients to help aid in weight loss, boost metabolism, and promote overall health. They are also a great source of antioxidants, vitamin C, and carotenoids for healthy eyes. In the garden, they grow in short to medium size bushes. Peppers can really thrive in pots and containers, which makes them perfect additions to your indoor vegetable garden.
Peppers love warm, wet soil, especially during seed starting and germination. In fact, you may even soak your seeds in shallow water for up to eight hours. This will help speed up germination by removing a lot of the enamel on the outside of the seed. A seedling heating mat and sandwich bags with a wet paper towel in them can provide a warm, moist environment to germinate your pepper seeds. If you do not have a seedling heat mat, you can place the sandwich bag on the top of your refrigerator or a warm sunny windowsill for a similar result.
You can also start your pepper seed in small starter pots. These are usually two or three inches in diameter and can be actual clay pots or biodegradable peat pots or pellets. A lot of indoor gardeners find it easier to start their seeds in peat material because you can transplant without disturbing any roots. The material can serve as both soil and plant food and degrades on its own over time. Therefore, transplanting your peat growing medium is as easy as placing the entire pot into a larger container. To keep the soil moist, use a spray bottle. Do not allow the soil to dry out.
Once the pepper plant has two sets of true leaves, it is ready to be transplanted into its final container. These can be individual pots or one large pot with at least two inches of space in between each plant. Be sure that you are using a loose soil with adequate drainage to fill your larger pots. Keep the plants in a relatively warm area with a great deal of sunlight. Bell peppers need about 14 hours of light, so it may be beneficial to invest in a grow light to supplement the amount of natural sunlight in your area. Water the soil normally, every few days or so.
An easy way to tell that your peppers are ready to be harvested are by observing its size and color. The size of your pepper will depend on the variety you choose to grow and the color will almost always start to change when it’s ready to be picked. You can always consult your seed packets or inserts for seed-to-table estimates for anything you grow.

Potatoes
Potatoes are a great addition to your indoor garden because they can be used in so many recipes. Potatoes are known to promote heart and bone health and can help maintain blood sugar. They are also a good source of vitamin B6, which is great for boosting metabolism.
Planting potatoes indoors is as easy as, well, planting a potato! Potatoes are one of the few plants where you can use the whole raw plant as a bulb to grow others. Because they grow completely underground, they are great candidates for deep indoor containers. Without the large, bushy overhead, potatoes will only take up as much space as you give them. Follow these steps to grow tasty potatoes in an indoor garden:
- Start with fresh potatoes that have many eyes. Eyes are the little sprouts that you’ll find on the skin after you’ve let them sit for too long. These will form roots in the soil to germinate and grow your new potato plants. If your potatoes don’t have too many eyes on them, place them in a sunny windowsill until they start to sprout.
- Wash the potatoes thoroughly, removing all old dirt. Once your potatoes are clean, cut them in half and stick three or four toothpicks in the potato. Space your toothpicks out evenly, as these will be used to prop the potato up.
- Fill a cup or jar to the top with water and place the potato on top ensuring that it is partially submerged in the water. Start by placing the potato in direct sunlight for about five hours a day until it starts to grow roots. If at any time the water becomes too cloudy, swap it with fresh water.
- In about a week, you should start to see roots hanging from your potato down into the water. Find a deep pot that can hold at least 2.5 gallons of material to plant your potatoes in. There are actually fabric pots made especially for growing potatoes. These pots have plastic windows on the side so that you can see your potatoes mature. Whatever pot you choose, start by putting small stones at the bottom of the pot to help with drainage. Fill the pot one-third of the way with loose potting soil. Place your potato in the middle of the pot with roots facing downwards and sprout facing upwards. Fill the pot with soil another third of the way.
- An important part of growing potatoes is “hilling.” This term refers to adding more soil to your pot to keep out any light that can affect your crop. Add as much soil as you can to the top of your potatoes in the shape of a hill, leaving only three inches of your plant sticking out. As your potatoes grow, add more soil to recreate the hill. Potatoes thrive in absolute darkest. Generally, the better they are kept in the dark, the more potatoes your plant will produce.
- Give the leaves of your potato plants between six and ten hours of sunlight, keeping the soil moist.
- Potatoes usually mature in about 10 to 12 weeks. If you’re using a potato pot with a side view, you will be able to see when your potatoes have reached a normal size.
Any of these vegetables make great indoor plants and even tastier homegrown appetizers. Grow these four vegetables to add color and flavor to your indoor garden.