Best Herbs For Your Garden and How to Care for Them

If you want to grow a garden that will provide you with a bounty of gifts after all of your hard work, then you’ll definitely want to incorporate herbs into your garden!
Herbs are wonderful plants that look beautiful and smell even better. Not to mention, if grown properly, they can produce yields that you can use in your kitchen all year-long! There is a plethora of herb species, but there are a few that you absolutely need in your garden for a kitchen that will never fail to flavor your dishes perfectly.
If you’re ready to embrace your inner herb gardener, these are the best herbs for your garden, and how to properly care for them.

Basil
Basil is one of the most popular herbs to grow in gardens. Not only is it fairly easy to take care of, but it will grow favorable yields all summer long. The leaves are large and attractive, and they tend not to bring in too many garden pests aside from slugs.
Basil is a must-have for chefs, since it pairs so well with so many things (including pizza!). It comes in a range of flavors, including cinnamon and lemon. However, it needs the perfect conditions in order to really flourish. Keep in mind, basil originated in India, which means the native plants are used to a great deal of sunshine and heat.
Growing Basil Inside
The great news about basil is that is it just as easy to grow indoors as it is outdoors. The best thing about growing basil inside is that you can reach over for a few leaves whenever you’re in the kitchen without having to go outside. (This is great for the winter!)
Watering Indoor Basil
To grow basil inside, you’ll need to use soil that drains easily and which is packed with nutrients. Basil does not like its roots to sit in water for very long, and you will quickly see the leaves start to wilt if it’s been over-watered.
Choose a pot that has drainage holes so that the water can escape the pot. The soil can be moist, but it cannot be soggy.
Fertilizing Indoor Basil
For indoor basil, a basic houseplant fertilizer should suffice. If there is a recommended amount on the packaging, it’s a good rule of thumb to use half the recommended strength. If you’re going to be using the basil leaves for actual food, consider using an organic fertilizer so that you can be sure it is safe for consumption.
Fertilizer is also important, because indoor basil will not be getting the natural nutrients that are found in the natural soil outdoors.
Sunlight for Indoor Basil:
Like most plants potted indoors, sunlight is a huge part of their success. Basil loves sunlight, and it will need at least six hours of natural light every day to grow properly. If you have one, place basil in a south-facing window to have the best chance of sun exposure.
For those without adequate light sources, synthetic lighting can be used as well. However, this lighting has to be on the plants for at least ten hours a day to provide the same nutrients that six hours of natural sunlight provides.
Growing Basil Outside
Basil likes a warm climate, and it will not respond well if you plant it before the frost is done. You’ll want to wait until you’re sure there’s no more frost before you plant your outdoor basil.
If you’ve been growing indoor basil through the winter, you can also transplant those plants at this time if you wish.
Soil for Outdoor Basil
Outdoor basil thrives in soil that is compost-rich and which drains well. If you notice that some areas of your garden hold their water longer after a rain, this isn’t the place for basil.
Growing Outdoor Basil from Seed
If you’ve got basil seeds, you’ll want to cover them with approximately a quarter-inch of compost or soil. Giving them a little bit of space is a good idea, since they can grow to be upwards of 24 inches wide.
Keep the soil moist and weed-free so that you don’t mistaken the small seedlings for weeds.
Sunlight for Outdoor Basil
Similar to indoor basil, outdoor basil will need at least six hours of sunlight each day for growth. Try to locate the areas in your backyard that get a good amount of sunshine; some gardeners prefer to use wall baskets so their herbs are further away from critters and pests.
Pests and Outdoor Basil
Slugs, beetles, and aphids are the most common pests you’ll see on your basil. Once you identify which one is eating your basil, you can respond with an eco-friendly remedy that won’t harm humans, animals, or the soil.

Dill
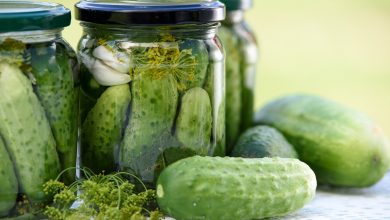
Beautiful dill is native to the Mediterranean areas of Europe and Asia. It is a versatile herb in the kitchen and it smells amazing no matter where it is! Dishes that dill is great with include fish dishes and salads, and the seeds are ideal when you’re pickling.
Dill is similar to basil in that it’s not overly picky, which makes it a great herb to grow either inside or outside. Keep in mind, though, that dill has a shorter lifespan than basil, and you’ll want to take advantage of its flavors during the smaller window.
Growing Dill Inside
You’ll want to plant dill indoors between the months of October and April.
Watering Indoor Dill
Dill is a drought-resistant plant, but it still likes water! Similar to basil, dill likes to have moist soil but no over-watering. This means that you’ll need a pot that has drainage holes and nutrient-rich soil that drains well, too. Some gardeners will incorporate perlite into the dill’s soil to ensure proper drainage.
Water lightly and often, but be sure that the soil isn’t soggy.
Fertilizing Indoor Dill
Indoor Dill should be fertilized every six weeks. Based on the measurements on the packaging, you’ll want to use half the strength suggested.
Sunlight for Indoor Dill
Since Dill is originally from the Mediterranean, it loves sunlight! This herb requires at least six hours of full sunlight each day, so it’s important that you can provide that before purchasing any plants or seeds.
Alternatively, you can use florescent lights for dill, but they will need 12 hours of light each day in this case. Keep these lights at least eight inches away from the dill to avoid burning or drying out.
Growing Dill Outside
Dill usually grows anywhere from two to three feet tall. You can plant it outdoors when the frost is done or in the fall before the frost returns.
If you plant in the spring, you can expect to have dill through the summer months. If you’re going through a dry season, be sure to check on your dill and keep its soil moist. It likes to be thoroughly drained, so only water when the soil is fully-dry.
Soil for Outdoor Dill
The best soil for dill is well-drained and loose. It grows best in soil with a pH level between 5.5 and 6.5, but it can still survive in soil anywhere between 5.5 and 7.5.
It will enjoy being in a warm place, so keep a look out for the areas of your garden that get the most sun on their soil for the longest time during the day.
Growing Outdoor Dill from Seed
Adult dill will need its own space, but you can start with seeds being planted 15-18 inches apart. As the plants begin to sprout, you can thin out the seedlings so the remaining fill plants are eight to ten inches apart.
The best place for dill is in containers.
Sunlight for Outdoor Dill
Similar to indoor dill, outdoor dill likes lots of sun – as much as you can give it. Find a space in the garden that gets the most sunlight; if the garden is already full there, you might consider planting the dill in a pot that’s hooked onto a fence or shed.
Pests and Outdoor Dill
The most common issues you’ll have to deal with when growing outdoor dill are aphids and powdery mildew. You can apply natural remedies to deter aphids; however, some people use dill to actually deter aphids from their other plants.

Chives
Chives are commonly seen across North America, Europe, and Asia. They are a hearty plant that are incredibly easy to grow, which means they’re perfect for even the beginner gardener!
Chives grow well both indoors and outdoors, which is perfect since they are so great for lots of flavorful dishes. In the wintertime, you can easily chop a few pieces from your chive plant and scatter them on pastas, salads, fish, and more.
Growing Chives Indoors
Sunlight for Chives
Chives love sunlight like most herbs, and they will do best if they can have six to eight hours of direct sunlight. With this in mind, try to find some room on a windowsill that faces a southward direction.
If you notice the chives are beginning to lean heavily towards the sun, give the pot a turn and let the other side benefit from some extra light. If you don’t have adequate light in your home, you can alternatively hang fluorescent lights about eight inches above your plant.
Humidity for Indoor Chives
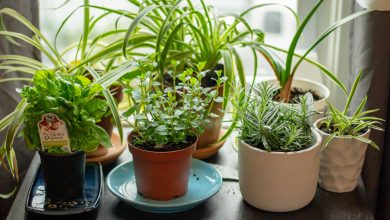
Chives are one of those indoor herbs that appreciate a great deal of humidity. The most natural way to provide this is to place your chive plant close to other plants.
This allows the greenery to pass humidity between one another; similarly, you can use a mister and a humidifier to add extra moisture to the air.
Fertilizing Indoor Chives
Chives that are grown inside will only require a low amount of fertilization. Similar to basil and dill, use about half the measurement that the fertilizer bag suggests. If you use too much, you run the risk of losing the strong flavor of the chives.
Watering Indoor Chives
Chives require a great drainage system, so it is ideal to incorporate a pot with a drainage hole and soil that has high-drainage as well.
The soil in a chive pot should be moist at all times, but never soggy. If the top layer of the soil is wet, it needs watering.
Growing Chives Outdoors
Chives, in their natural outdoor environment, are a hardy plant that form in clumps and grow rapidly. They can grow anywhere from 12-18 inches in height, and they will eventually sprout small lavender flowers at their tips.
Chives are ideal for harvesting for consumption, but they are also very beautiful when left to fill voids or line gardens. If you’re not careful, these chives can take over like weeds, so it’s ideal to prune them every few summers.
Growing Outdoor Chives from Seeds
Chives are one of the easiest plants to grow outdoors, making them ideal for any gardener trying to establish some herbs. Their seeds require little work, and they are perennial, which means, once they’re in the ground, they will keep coming back every year.
It’s best to start your chives indoors and to transplant them outside when they are two to three inches in height. This will take about six weeks in total. They’re best to begin in some sort of organic-mix soil or rockwool.
You’ll want to plant about six bulbs in a group to make sure they don’t get out of hand.
Soil for Outdoor Chives
Chives, like most herbs, require lots of drainage and moist soil. They also prefer soil that is fertile and rich, so implementing a rich layer of compost into their soil will do them very well.
Sunlight for Outdoor Chives
While other herbs only need about six hours of outdoor sunlight, chives like full sun for the entire day. This is why indoor chives require such a strong indoor fluorescent lamp if you’re growing inside. Find the spot with the most sun for the entire day and plant chives there.
While other plants often do well in smaller pots hanging on fences and sheds, chives tend to grow much taller and will be less of a hassle when planted at ground level.
Watering for Outdoor Chives
Chives will do best with a good soaking of their soil, in connection with full drainage to avoid root rot. Allow the soil to become almost completely dry before watering again.
Pests and Outdoor Chives
The most common pests you’ll see in the vicinity of chives are aphids and thrips. Both can be harmful to your plant, but they can be removed with garlic spray, neem oil, and the introduction of more ladybugs to your garden.
If you’re having a hard time with aphids or cabbage worms on your other beloved plants, you can also use chives to deter these creatures.

Tips for Growing Herbs Indoors
If you’re thinking about starting a herb garden indoors, you’ve got all kinds of choices and lots of chance at success! Here are some additional tips for growing herbs indoors:
- Try using fish-fertilizer for your herbs: This type of fertilizer is low-odor, making it ideal for indoor planting. Additionally, it is very rich in organic matter and breaks down slowly.
- Grow herbs in separate pots: Even if it seems efficient to grow your herbs in one pot, they need their own space to grow. This is partially because of their size and their unique reactions with the soil.
- Provide good air circulation: Most herbs are native to hot areas, and keeping them happy means humidity and air circulation. Consider keeping the windows open in the hotter months and using a fan in the colder months.
- Keep the area warm: Herbs do best in a warm environment. When the winter comes along, try to keep them away from the windows where drafts linger.
Tips for Growing Herbs Outdoors
If you prefer to grow your herbs outdoors, consider these tips that will ensure healthy growth:
- Research the pests commonly attracted to the herbs you want to plant, and use that knowledge to prep your garden before planting.
- If you live in an area where the temperature often exceeds 90 degrees Fahrenheit, be mindful of where you plant your herbs. Plant them where they will get lots of sun in the morning and shade in the hot afternoons.
- Always be mindful of how big your herbs can get and use this to space them adequately. Dill, cilantro, and chives need to be one to two feet apart; Basil and thyme need to be two to three feet apart; Mints, oregano, and rosemary need to be three to four feet apart.
- Before you plant your herbs, loosen up the area with a rake or garden fork. Then, mix in about an inch of compost. You’ll have an aerated, nutrient-rich soil base that will ensure good growth.
Healthy Herbs for Harvest
If your herbs are planted with adequate water, soil, and sun, then you should be able to harvest them many times throughout the spring and summer. Cared-for herbs will yield lots of supply for your kitchen needs, so much that you might want to give some away!
Herbs are the garden gifts that keep on giving, so plant some today!