Fun DIY Projects To Spruce Up Your Garden
There’s really nothing like the feeling of accomplishment you get when you create or build something beautiful or useful from scratch. It’s hard to explain, intangible even, but it’s a noticeably positive feeling anyone who completes or accomplishes something can attest to. It’s one of the most satisfying feelings there is, and with the popularity surrounding Do-It-Yourself projects growing by the day, it’s as easy as ever to chase that feeling. Do-It-Yourself (DIY) projects are not just a great way to get that feeling of accomplishment you crave; it’s also a way to boost your creativity, learn new things and skills, and save you tons of money!
Doing fun DIY projects can help teach you new skills you never thought you’d be able to acquire and build things you thought you’d only ever see packaged in a superstore. Doing these projects together with your loved ones is also a great way to bond and create a meaningful relationship through your joint efforts. And while you’re building new skills and relationships, you’re also saving yourself a lot of money! One of the biggest benefits of getting into DIY projects is how much money you’ll save by buying things separately and building them yourselves.
DIY projects can easily delve into almost any area where an artistic touch and a craftsman’s handiwork would apply, but today we’ll talk about a few fun DIY projects you can put together to spruce up your garden. There are unique stepping stones, repurposed watering cans, lovely window boxes, and countless other garden and yard ornaments and decorations that will give your garden, yard, or patio a perfect touch of rustic style. Not to mention all these DIY projects will undoubtedly lead to harrowing and hilarious stories and anecdotes that you can dish out to your guests whenever your hosting in your garden wonderland.
Let’s get started!

Rhubarb Stepping Stones
Stepping stones are a great way to give your garden or yard a nice change of pace, while also keeping your lovely plants safe from any meandering human feet.
But instead of going to the store and buying an unoriginal set of stepping stones, why not buy a few materials to create your own unique DIY version? If that idea interests you, check out this awesome DIY project where we’ll create beautiful stepping stones with nothing but a bag of concrete, a little bit of chicken wire, a poly sheet, and a few freshly cut rhubarb leaves.
If you follow these steps to the tee, you’ll end up with a charming set of stepping stones with a lovely, natural rhubarb motif.
Steps:
- Buy concrete mix, chicken wire, poly sheet
- Gather freshly cut rhubarb leaves
- Lay rhubarb leaves spine up on the poly sheet
- Cut the chicken wire into the size of the leaves
- Pour one inch of concrete on each leaf
- Place the chicken wire on top of the one inch
- Pour another inch of concrete on top of the chicken wire
- Smooth and pat into the heart shape of rhubarb leaves
- Cover the leaves for two days
- Uncover and sprinkle on some water, re-cover for another five days
- Peel the leaves off if you’d like, or let nature take care of them over time
- Voila!

Free Compost Bin
Composting isn’t pretty, but it’s an important part of gardening that can really reduce your carbon footprint. Composting only makes sense: if you’re not going to eat your table scraps, why not put them to good use in your garden instead of sending them to the Earth’s overflowing landfills?
Other than being environmentally responsible, composting also saves you countless trips to take out the trash, while also saving you tons of time and money that would usually be spent going out to the store to buy other fertilizers for your garden. So all in all, you’re saving time, money, and the Earth at the same time! That should be enough to get over the objectively gnarly outlook that this project might impose at first glance.
If you don’t want to go out and waste your money buying a compost bin at the store, you will love this free DIY compost bin project. You can buy a new plastic bin to use as a base for this project. But it’s always best to avoid buying new plastic products and reuse any plastic products we already have. Not to mention, that’s what makes the whole thing free!
Steps:
- Recycle any plastic bin you have lying around that is at least 24 inches tall and has a lid – this will be the base for your compost bin
- Use a drill to make about eight to ten small holes in the bottom of the bin for aeration
- Next, fill the bottom of the bin to one eighth or one quarter with a bunch of ripped newspapers or dry leaves
- Add in dirt until the bin is halfway full
- Toss in all your table scraps and paper products you’d like to compost into the bin
- Be sure to know what you can and cannot compost- check out this list for help
- Grab a shovel and stir your compost until it’s covered by the dirt
- Spray it down with lukewarm water but don’t overdo it – you want it to be moist, not soaked
- Pick that drill up again and make another eight to ten holes in the lid and fasten it on top of your bin
- Find a shady spot to keep your compost bin so that your compost doesn’t dry out. If you live in a building or have no outdoor space, the patio could be a pretty good candidate for this
- Set up a compost receptacle inside your home next to your garbage and recycling receptacles. This will help keep your mind on composting when you’re doing away with table scraps
- Empty your indoors compost receptacle into your compost bin outside regularly and stir it up each time
- After two to three months, the compost will be ready for your yard or garden as mulch, potting soil, or lawn conditioner. But be sure to leave at least a third of the bin full to keep the composting process rolling

Concrete Garden Spheres
There are countless new and fun little pieces popping up every day to add to your yard or garden that could give it the perfect serene accent it needs. And these concrete garden spheres could be that final piece. They give your garden a classic, distinguished look in the best of ways, but be careful – add too many, and you could clutter your yard enough to take too much of the attention away from your beautiful plants.
While these charming garden ornaments usually go for hundreds of dollars at home-improvement and garden centers, there are ways to make them yourself for a tiny fraction of the retail cost. And doing it yourself can allow you to let your creative side loose and discover a lot of fun new designs other than the classic, smooth sphere.
Here, we’ve laid out a cheap DIY way to make your own charming set of five concrete garden spheres – three round ones, and two in more custom or quirky shapes. All you’ll need are a few lighting globes, which you can find at Habitat for Humanity Re-Store for two dollars apiece or at your local thrift shop, and a four dollar, 80 pound bag of Quickrete Concrete Mix.
Steps:
- Assemble your globes in a cardboard box or some such to stabilize them
- Mix your concrete mix with a little bit of water and stir until your desired consistency is achieved. It should somewhat resemble the consistency of peanut butter
- Shake your mix a little bit to make sure you get all those pesky air bubbles out
- Carefully fill your globes through the bottom hole, then cover the holes with duct tape or some other adhesive tape
- Let them sit for 24 hours
- Take the globes out and put each of them into a heavy-duty garbage bag
- Make sure you’re wearing good, strong gloves, and once you’re ready, tap the globes lightly through the garbage bag with a hammer to break up the glass and separate it from your concrete garden spheres
- Carefully remove the concrete spheres from the garbage bags and dispose of the bags and broken glass
- Take those charming, unique concrete garden spheres that you’ve made with your own hands and set them about your yard or garden to accentuate your beautiful plants

Bamboo Water Feature
Bamboo is always a welcome and refreshing sight in any garden or yard. It’s a renewable resource, which means it’s environmentally friendly, and it’s also an aesthetically pleasing complement to any plants you’re trying to really draw the eye towards. And while we’re at it – another lovely garden decoration that automatically brings your setup to the next level is a water fountain nestled into your greenery. So that would make a fountain made of bamboo the absolute gardening dream, right? Well, dream no more, because now you can make your own affordable DIY bamboo water feature in your yard.
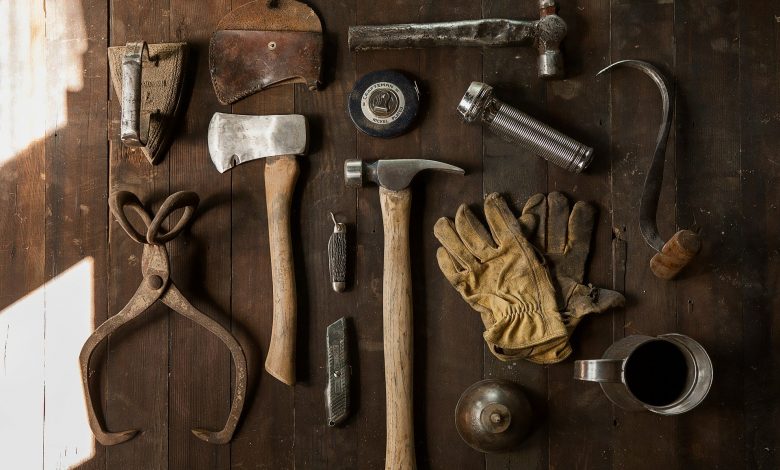
We’ve done the research, and below you’ll find the basic steps for getting this awesome project done all on your own. This DIY project is definitely a little bit more complex than the ones we’ve looked at so far, but anyone with the means and the will can definitely figure this out and get it done.
You’ll need a few bucks and a few supplies, but this could definitely be a two-day project on a beautiful weekend. You’ll need a decent amount of tools that will be mentioned below. And you’ll also need to pick up some copper wire, PVC pipe, drywall screws, pinch valves, plastic water line, pond liner, a pond pump, sand, and split bamboo sections with one-inch supports.
Let’s dive right into the easy-to-follow steps and give your garden an extra element of serenity and zen with this soothing bamboo waterfall.
Steps:
- The first thing you have to do is dig the hole where you want the bamboo water feature to be. Think of a pond and dig a little deeper than you actually see the pond being in the end.
- Set your pond liner down on top of a two-inch bed of sand in the hole you’ve just dug up. Make sure that you keep the lip above the soil to keep the setup from muddying your water
- Install your pond pump and use sand to fill around the liner to support the sides of your newly made pond.
- Lay the water path with your bamboo sluices at six to ten-inch slopes and arrange them in whichever design you prefer
- Remove the nodes from the bamboo sluices with the back end of your hammer so the water can flow smoothly
- Build your bamboo support crutches for the sluices at the desired height and angle
- Use your copper wire to fasten the crutches together, winding five or six times to make sure it’s tight and secure
- Repeat steps 5 – 7 for each sluice in your bamboo water feature, while checking the water flow after you add each one
- Cut off the top of a four-inch-wide length of bamboo just above a node so that the water won’t collect in the top
- Measure and remove a section for the spout base that’s roughly 12 inches longer than the height of the next sluice
- Knock out all the lower nodes in the spout base with a hammer and a piece of two-inch PVC pipe
- Cut a 45-degree angle on the bottom of the PVC pipe and put it about eight inches into the ground, just behind the last sluice
- Position the bamboo spout base over the PVC pipe
- Mark the spot on the spout base where the spout will go and drill a hole there. Make sure the bamboo spout fits nice and snug into the spout-hole
- Drill another hole in the spout base’s bottom and thread the water line through there and out the spout-hole
- Put the spout base back over the PVC pipe and fasten it with a pair of drywall screws
- Slip the spout into the spout-hole
- Connect the water line to the water pump
- Now you can enjoy your own Japanese-style bamboo water feature!

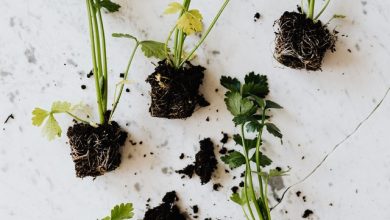
Recycled Plastic Jug Planters
Planters are a great way to display your beloved plants, and you can choose from countless shapes, sizes, and designs. And another important benefit of planters is the fact that they’re just so simple: they’re nothing but a receptacle with an open top. A concept this useful, yet this simple is always sure to spawn countless DIY projects that can help our planet by recycling, reusing, and repurposing. You can use almost anything as a planter as long as it can handle a little moisture from time to time. It could be old mason jars, old milk jugs, or literally any other small or medium-sized plastic bottle.
Here’s a quick and simple step-by-step DIY project right in this vein. It turns used plastic bottles that would’ve ended up in a landfill into gorgeous and colorful additions to any garden or yard setup. You can also display them indoors or even as a fun micro-hanger if you find a bottle/plant combination that’s small enough.
Keep reading to learn about the steps for making these recycled plastic jug planters.
Steps:
- Rip off the outside label of the used bottle
- Cut the bottle diagonally and gently sand any jagged edges. For cutting, an Exacto knife is probably best, as scissors wouldn’t cut through the plastic as smoothly
- Paint the bottle whatever color you feel like – bright, vibrant colors work best to spruce up the feel of your garden
- Let the paint dry
- Poke a hole in the bottom of your painted bottles to allow drainage
- Fill the bottles halfway with dirt
- Nestle your plants into the dirt
- Poke two holes across from each other on the sides of your bottle. Don’t worry if the holes aren’t evenly leveled that can be fixed during the next step
- Thread a neon rope through the holes and knot the rope at the top. Level the planter out when tying the knot so that it stays upright and doesn’t topple over
- Find a tree, branch, or hook to hang your recycled plastic jug planters
- That’s it – you’re done! Now your garden has a few cool hanging planters.

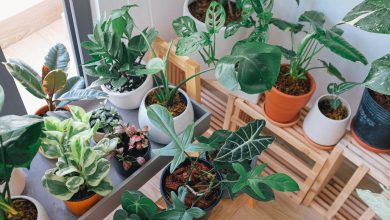
Flower Pot Table
A classic part of a DIY project is the repurposing of something so we can turn it into a fresh, new version of something else. When it comes to gardening tools, decorations, or accessories, the flowerpot is one of the easiest pieces to repurpose and reuse. Not to mention, there are literally hundreds of different, funky, and creative ways to repurpose a flower pot into another fun yard accessory.
And if you just realized that you’ve got a few flower pots kicking around that you just don’t know what you should do with – we’ve got quite the project for you right here!
We’d suggest waiting until you have a couple of flower pots that you no longer use, but if you just have to get this DIY project done, you can buy yourself a pair of cheap, large flower pots to complement the ones you’ve got on hand. Add in a cheap pizza pan and some spray paint, and voila, you’ve got a sleek, sculptural side table that will fit with any spatial design. Whether it’s outside on the patio, near your garden, or even inside your living or family room.
Here’s a step-by-step guide to putting together these unbelievably simple make flower pot side tables!
Steps:
- We suggest that you use two 12-inch wide flower pots, but the size is really up to you
- The pizza pan has to be the same size as the flowerpots, so if you’re using a 12 inch flower pot you need to use a 12 inch pizza pan
- It’s literally as simple as stacking the flower pots on top of one another and then topping it off with the pizza pan. This option provides for a more temporary side table that could still be reverted to a flower pot if you so choose
- If you want a more permanent and stable side-table, then you can drill a hole in two pieces of scrap wood
- Put the pieces of wood inside the pots
- Run a long-carriage bolt through the wood and flower pots
- Add a washer and a nut, then tighten the nut until it’s secure
- To make the seam between the pots less apparent use a bead of caulk, then smooth it out with your fingertip
- Spray paint the pots in whichever color or design you prefer
- You’re done! Now set that fresh and colorful side table up next to your favorite lounge chair, put your drink on your new DIY flower pot table, kick back, and enjoy!