Gardening Lifehacks to Save You Time and Money
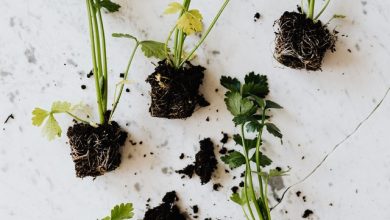
Gardening is great; nobody here is going to disagree with that. It’s a fun way to pass the time, relax with nature, and make your home look pretty all at the same time.
However, it takes time – a lot of time. Plants are like babies. They need nourishment, constant care, a safe and healthy environment, and the right nutrients for them to grow up big and strong. Now, a baby demanding this is one thing, but often we just don’t have that much time to devote to looking after plants.
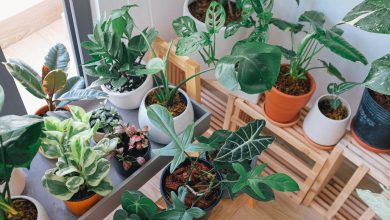
That’s not even touching on how much it can cost. Soil, seeds, fertilizer and compost, tools, equipment, and more all put a dent in the budget.
We bring you some simple garden lifehacks that can save you time, money, or both!
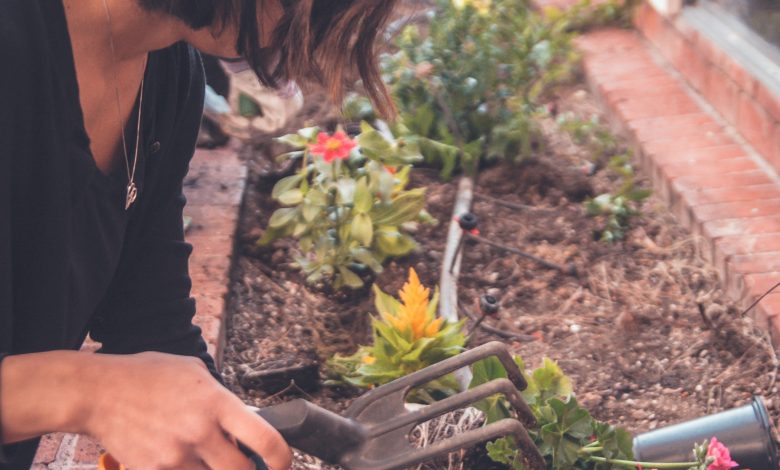
Automatic Plant Watering
Somedays, you just don’t have the energy to get up and feed the plants. Maybe you’re sick, the weather’s bad, or you’re a walk away from your garden and feeling lazy. It happens, and your garden suffers as a result.
While plenty of people opt for automatic sprinklers, they can get expensive really quickly, require you to have the right plumbing, and are only really useful for large plots.
That’s where this handy invention comes in. Not only does this system save you the time of having to water your plants and the money of buying sprinklers manually, but it can also ensure your plants stay hydrated when you’re on your summer vacation.
The system is really simple. First, get yourself a big bottle of water – the bigger, the better. Fill it up and close the lid. Then grab two pot plates, or something similar, and set the water bottle in one. In the other, put your potted plant.
Run some tubing from one plate into the other, pierce a hole in the bottom of the water bottle, and you’re ready to go.
The water won’t overflow so long as the hole is lower down than the plate edges, so keep that in mind.
With this system, your plant absorbs only the water that it needs, when it needs it, until the water bottle is empty. Pretty ingenious.
While this is great, simple, and cost-effective, it does require you to have your plants in plant pots, not the ground. You can connect multiple pots to the same bottle, but it drains faster the more you have connected.
Still, if you have potted plants and are going away for a week or so, this is a great way to make sure they don’t go and die while you’re off enjoying your vacation.

Cleaning and Sharpening Tool Holder
Tool maintenance is critical when it comes to gardening. Trowels, gloves, and shovels get mucky, then they get blunt, then rusted, and then they begin to crack and break.
When they begin to crack and break, then you need to replace them. That means you go to the store, open up your wallet, and dish out the cash for something that you already own. All because you didn’t clean it.
So you want to avoid that, but you don’t want to go through the labor of whipping down and sharpening your tools every day? Well, this next hack is just what you need.
Making this holder is quick and easy. You need:
- Mineral oil
- A large bucket or container
- A terracotta pot (not too big)
- Some sand
Firstly, mix your sand and mineral oil together in a container using a trowel. Be sure to mix it well so that the two are evenly distributed around the concoction. Next, fill your terracotta pot with your mixture. If the pot has a drainage hole at the bottom, make sure you seal it up with some duct tape.
Fill it nearly to the brim, and pack it down lightly.
That’s it. You’re done.
Not only is it a space to store your tools, but it keeps them nice and sharp as well. You can also decorate the pot if you want. Use some spray paint and pottery sealer or some acrylic paints, and decorate it with some daisies, if you have the artistic talent and are feeling brave.
Homemade Soil pH Kit
One of the more tedious aspects of maintaining a garden is all the scientific mumbo jumbo that comes with it. You need to keep track of sunlight, any toxic substances in the soil, drainage, and most irritatingly of all, pH levels.
You can’t just ignore this either, especially if you’re growing fruit and vegetables. Luckily, you don’t need to venture off in search of pH strips to keep an eye on your soil’s wellbeing.
Instead, you can follow these easy steps.
First up, alkaline. Alkaline pH is any level above seven and is good for growing a variety of trees and shrubs. To check if your soils are alkaline, first, get a sample of what you’re testing, and place it into a container. Then, pour some regular household vinegar in on top of it.
If you begin to hear a bubbling sound and your mixture froths up, then the soil is alkaline.
Acidic pH is on the other end of the spectrum. It’s any level below seven. Vegetables and fruits react well to this type of soil, so it’s particularly important.
Again, get your sample of soil in a container. Instead of vinegar, mix in baking soda and water. Mix the slop well and watch the reaction. If you get the same frothing and bubbling, then the soil is acidic.
If you perform both these tests, and the soil reacts to neither, then count your lucky stars because you have neutral soil, which is the best type you can ask for.
Mini-Greenhouse
Perhaps you’re looking to grow a plant that you need a greenhouse environment for or want a nice decorative flower to sit on your desk, but you don’t want to go all-out getting an expensive greenhouse. Either way, this is something you’re going to want to take a look at.
With these, not only do you get the benefits of a greenhouse without the cost, but you get a quirky, cute looking decoration, and are recycling to boot. It’s super simple, too!
First, get a small plant pot that you’re going to be using. You can also use the bottom of the plastic bottle you’re about to cut up, but this looks way better.
Fill the planter with soil, and plant your seed. Then, cut the plastic bottle lengthways at whatever height you want, and then slot the top half of the bottle over the soil. You can pack it down the sides of the pot, so you get this cool dome effect.
You can control the humidity by keeping the cap on, which creates humidity, or taking it off, allowing the water to escape.
Once your seed outgrows its little dome, transfer it to a bigger pot and start again.
Now, needless to say, you don’t have as much control over your plants compared to using a hundred dollar greenhouse, but this method costs nothing and is at a much smaller scale, so it may suit your needs better than any big, extravagant piece ever can.

The Coffee Filter Trick
Chances are you’ve already heard of this little gardening lifehack, but if not, let us explain.
As you know, if you keep potted plants on your desk or decking, they get all kinds of messy when you water them. Soil leaks out the bottom, creating a world of deck scrubbing misery.
This trick sets out to solve that issue and does so remarkably well. You can even use it with the last lifehack to create a cute ornament for a tabletop.
It’s remarkably simple. All you have to do is place a coffee filter at the bottom of your pot before you fill it with soil. If you don’t know how coffee filters work, essentially, they stop all the granules and ground up coffee beans from going into your mug — instead, allowing the water to pass through the mixture, giving you a smooth brew.
The same principle applies here. They allow the water to pass through so that your plant doesn’t get waterlogged but stops all the little bits of dirt from coming with it.
It’s an incredibly simple yet effective solution to such a troublesome problem.
Shoe Rack Garden
You read that right; you can make a garden in a shoe rack. This is great for those of you who are low on space, as it allows you to grow vertically, and for those who want a neat and organized way to grow plants like herbs.
It’s a great addition to your plot, but it requires a bit of preparation.
You’re going to need:
- A shoe rack
- Screws or a curtain pole and attachments
- Your compost
First, you need to attach the shoe rack to wherever you’re putting it. You can drill some screws into a wall to hang it, or attach the curtain pole to the wall with the relevant fittings, and hang it off – either way works.
Next, you’re going to poke some holes at the end of each of the shoe compartments to allow for drainage. Then hang your rack off of the fitting you have set up.
Pour some water through it to make sure that the holes are big enough and adjust where necessary. Then, add your soil and your seeds.
If you want to avoid having the excess drip water do damage to any wood you have lying around, set up a through underneath the rack, and make sure that it is lined up in a way that allows the water to flow into it.
It can be difficult to pull this lifehack off correctly, but when done properly, it’s a great space saver and an extra bit of organization.
Paper Towel Babysitter
Remember the automatic plant waterer? This exists in the same ballpark, but this one’s primary function is to keep your plants ticking over while you’re away on your holidays.
You’ve probably heard of this method before, and that’s because of just how well it works. It’s just as effective, if not more so, than the automatic system mentioned earlier, and significantly simpler.
To pull this one off, get yourself a big roll of paper towels. Get a big line of it, and roll it up as tight as you can without breaking any of it. Make sure it’s long enough to run along the length of the planter you’re using it for.
Then, lay it across the soil, a few inches away from the plants, and put each end of the tissue paper into a large glass of water.
The paper gradually absorbs the water from the glass, and the plants, in turn, absorb it from the paper.
This works best when you have a long planter, but can be used for different types if you’re really keen.
It’s not a long-term solution, and definitely not something you want lying around your house/garden, as it’s quite the eyesore, but for when you’re going away and can’t water, it makes the perfect plant babysitter.

Biodegradable Planters
Just like our plastic bottle mini-greenhouses, this lifehack gets you extra brownie points for taking care of the environment.
Your regular plastic plant pots are, obviously, non-recyclable. Neither is terracotta, so chances are whatever you’re planting your flowers in is not environmentally friendly. That’s what this handy lifehack is for.
Granted, you won’t be using this as a complete replacement for sure. They don’t look great in large numbers, and you won’t single-handedly kill the planet by using some regular pots, but it’s always good to do what we can.
What this hack involves is folding up some old toilet paper rolls in order to make a mini planter. Not only that, but because the cardboard is biodegradable, you can use these for germination, then just go and plant the whole thing in your garden.
First, cut eight slits into one of the ends of your roll. Then fold them over so they overlap in a cascading sort of pattern. Fill it with soil, set it in baking parchment, and you’re done! Wait for your seeds to germinate, then go ahead and stick the whole thing in the ground, guilt-free!
Epsom Salt Fertilizer
Want to avoid spending cash on some fancy fertilizer? Use Epsom salts. You can get these in any store that sells skincare or bath remedies.
Also known as magnesium sulfate, Epsom salt has tons of physical remedy applications, but it’s not just humans that can benefit from its healing properties.
Magnesium is a common ingredient in most fertilizers; it helps with germination, the production of chlorophyll, and nutrient absorption.
You can mix small amounts of it in with your water monthly for your plants, but to get the most out of it, you’re going to want to turn it into a foliar spray. Diluting it with water and misting your plants with it is going to increase growth massively, and that’s without going nuts on some branded fertilizer.
You might even have a bag of this lying around in your bathroom that you don’t know about, so why not put it to use?
Of course, you may not get just as much growth as you would with an expensive, concentrated product, but give it a shot and see.
Zest Seedlings
The last lifehack on this list is perhaps the most common. Everyone knows about this trick.
These handy little things are similar to the biodegradable plant pots that were mentioned earlier. They allow you to germinate your seeds before planting them directly into the ground hassle-free.
You can use any citrus fruit for this – lemon, orange, or lime all work.
So say you’re making some freshly squeezed lemonade on a hot summer’s day, you cut a lemon in half, squeeze out all the goodness, and throw it away. Except no, you don’t throw it away.
Instead, clean the insides of the lemon out, getting rid of all that pulp and mush. Then, add a hole in the bottom to allow for drainage. Fill it with soil, plant your seed, and done. Super easy, super quick, and super convenient.

So there you go! Some easy gardening life hacks to save you time, money, and stress.
Gardening is great, but a few cheat codes can go a long way to making the whole process just that bit sweeter.
Having said that, don’t skimp out on all aspects of maintaining your garden. Sure, it’s great to save money, time, energy, stress, and the planet, but at the end of the day, what matters the most is the satisfaction you get from maintaining a pretty garden, and that is at stake if you skip all the corners.
At the end of the day, things cost money and take time for a reason. You often see better results with store-bought solutions over the homemade gadgets you see on this list, so make sure you find the right balance between being techy and doing things the good old-fashioned way.