How to Build a Vertical Garden
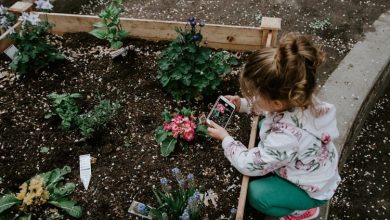
Building a vertical garden is an excellent way to save space while creating a work of art that can delight both your eyes and your taste buds. There are many perks of building vertical gardens: they allow plants easier access to sunlight; they give you easier access to water your plants; plants stay pest-free by being elevated; and lastly, your plants receive better air circulation. In this article, we’ll cover all of the various ways you can build a vertical garden, both inside and out.
Use Pockets to Hang Your Plants
Pocket planters are the easiest way to go about building a vertical garden, both inside and outside of your home. There are so many different sizes and varieties of pocket planters, making it easy to grow whatever you’d like, wherever you’d like.
Some pocket hangers are fancier than others. The high-end versions have hydroponics systems that take all of the guesswork and maintenance out of the equation, leaving you with a sustainable garden that can provide easily harvestable vegetables all season long. Some systems are more sophisticated than others, but you can buy a self-watering vertical wall planter for under $20 at your hardware store.
There are many different shapes, sizes, and features to choose from when buying pockets to hang your plants vertically. So to keep everything uniform, pick wisely the first time around if you are planning to ever add more pockets in the future. Hanging pockets are one of the most efficient ways to build a vertical garden, and they are relatively inexpensive as well.
Vertical Pot Garden
If you have never seen a vertical pot garden, you may want to start stacking pots right now to create your own version. However, you should first go out and look for pots that are meant to be stacked because they provide you with all the bells and whistles that a DIY stack job likely lacks. They also won’t fall over and create a mess of ceramic and soil.
Pots that are designed to be stacked feature a slow drip that ensures each plant in the stack receives the proper amount of water. The shape of the pots will minimize the sun from drying out the soil and prevents water from evaporating from the soil too quickly.

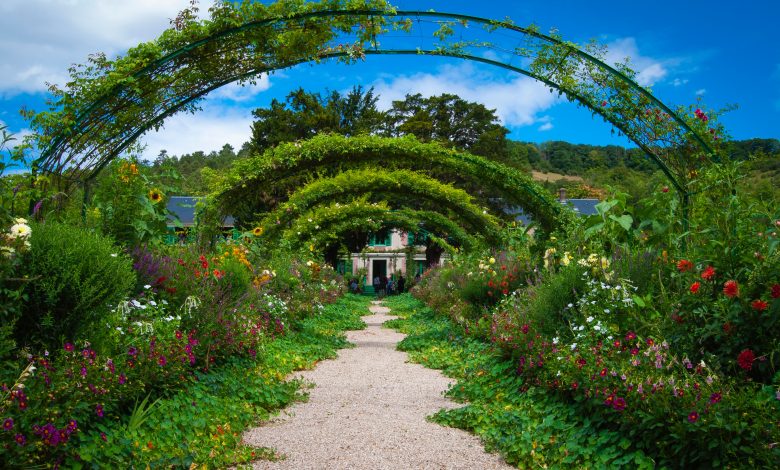
Use a Vegetable Ladder
Vegetable ladders are gorgeous architectural highlights in any garden. If you cannot find one for purchase and you or someone you know is handy with a hammer and nails, you can make your own.
The outside of the ladder is the easy part, as you can buy two two-by-fours and lay them with the thin edge against the wall. Building the flowerpots will be more of a challenge but could make for a fun summer project if you have the right equipment.
Items that can be referred to as “vegetable ladders” are not always marketed that way. Take this four-foot vertical raised garden bed, featuring five tiers of growing spaces for your plants. Vegetable ladders such as this one are perfect additions to a patio or balcony.

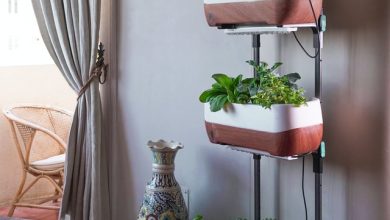
Indoor Vertical Garden
Do not fret if you are short on enough space for an outside garden, or if you live somewhere without an outdoor space. An indoor vertical garden, also known as a living wall, can be a fun, stylish, and tasty project to take on. And while there are many different DIY options for designing your indoor vertical garden, there are also many products available specifically for growing plants vertically indoors.
For instance, take this all-in-one vertical vegetable garden called the Nutritower. It hangs and waters your plants while also providing the light they need to grow. This appliance allows you to grow fruits, vegetables, and herbs all year long from the comfort of your home. While the Nutritower is all about efficiency and growing food, there are many more stylish options available for your indoor vertical gardens, such as this fun wooden frame.

Growing Frame
A growing frame is a simple way to create a vertical garden if you have plants that enjoy wrapping their stems around the closest object. Examples could be tomatoes, cucumbers, and beans, or any type of vine. Growing frames come in many designs and sizes and can be found inexpensively at your local hardware store.
Make a Succulent Frame
Much easier than building a vegetable ladder is making a succulent frame.
How to Make a Succulent Frame
Here is what you’ll need:
- Succulents
- Potting mix for succulents
- Four frame moldings (found in a hardware store)
- Hammer and nails
- Plyboard or picture frame board
- Plastic bag or film
- Handsaw
- Pencil
- Glue
- Chicken wire and wire cutter (optional for stability)
- Moss (optional for a stylish look)
Instructions
1. Make a frame by joining your pieces of wood and hammering them together. Optionally you can likely buy a frame at the same store where you buy the moldings.
2. Measure your picture frame board or play board to cover the back of your frame. Cut with a handsaw.
3. Glue and hammer the plyboard to the back of the frame.
4. Stretch your plastic bag or film across the inside of the frame to waterproof it.
5. Add soil to the frame and fill it just before it gets to the top edge of the frame.
6. If you are using moss, add moss to the top of the soil. Now, arrange the succulents across the frame and move them around. Once you are satisfied, remove them again.
7. Take the chicken wire and place it on top of the soil. Cut it to size and use a staple gun to attach it to the frame.
8. Now it is finally time to plant the succulents. Using your wire cutter, make holes for the roots, and create a hole in the soil. Snugly tuck in the plants and cover the hole with moist soil. Your succulent frame is now complete.
Recycled Pallet
Another idea inspired by a ladder is to use a recycled pallet. If you are into rustic décor, skip the building or buying and go straight to the recycled pallet. You will be stunned at how well it works. What gives the recycled pallet such an advantage is the inch-wide openings between each board. These openings provide plenty of room for plants to sprout out of and also help to keep them in place.
How to Build a Pallet Garden
First, of course, you will need to find a pallet. How do you get free wooden pallets? If you are not lucky enough to already own an old pallet or have a friend or family member that does, there are many places where you can find one for free.
Small businesses that use pallets for shipments are your best bet. Bigger companies likely already have a system for recycling and disposing of pallets. But smaller companies might not have the budget for a hauling service and might end up leaving their old pallets out near a dumpster. All businesses that have inventory use pallets, so your possibilities are endless. Start with a local hardware store, a small garden shop, or even your local pet store and see if they’d be willing to give you a pallet.
Materials
Once you’ve secured your pallet, here are the other materials you will need:
- Landscape fabric
- Staple gun
- Hammer and nails
- Sandpaper
- Potting soil
Instructions
1. Take your sandpaper and go over any rough patches on the pallet to prevent splinters.
2. Stretch your landscape fabric across the back and all four edges of the pallet. Leave some excess fabric to fold later. Now, take your fabric roll and fold it at one end and double or triple the amount of fabric across the pallet before making your final cut. This will be the support for your soil, plants, and roots, so it needs to be firmly secure.
3. Take your staple gun and start stapling the fabric to the back of the boards. Make sure to fold the fabric at the corners to keep the seal tight before stapling.
4. Now, lay the pallet down in its natural position, with the fabric side facing down. Fill in soil through the slats, making sure to press down firmly, while still leaving enough room for your plants.
5. Start planting from the bottom of the pallet on up to the top. After each section, press the soil down firmly. When you are done planting, add more soil as necessary to keep the plants firmly in place.
6. Keep the pallet horizontal for at least a week or two to allow the plants to firmly take root and water daily during this initial growing period. Start watering at the top and water each new section a little less, as the water will trickle down through the soil.
7. Once you are sure that your plants are happily growing, you can finally tilt the pallet vertically and enjoy your stylish garden wall. You can even go a step further and mount the pallet to a wall to create a striking piece of art.