How to Grow the Best Watermelons

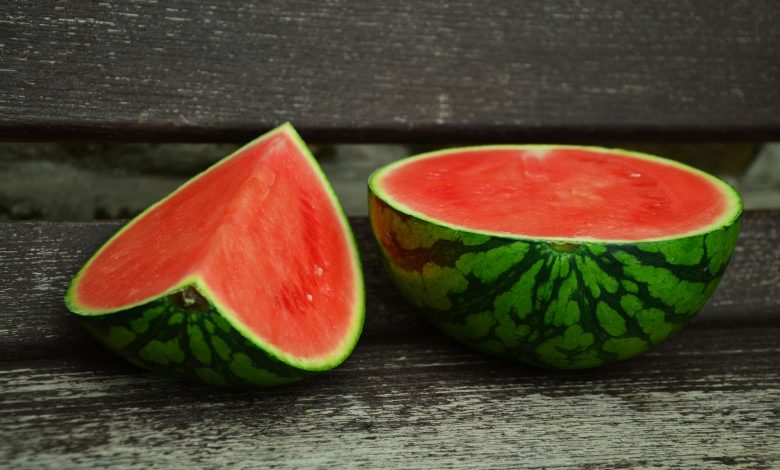
We’re sure you are eager to learn how to grow these marvelous fruits in your very own backyard. Now, just imagine having a big, juicy bite of your next home-grown, sweet watermelon during the hot summer season.
Growing watermelons is quite rewarding, but it can definitely be a tricky endeavor. We’re not saying that you need to be an expert to get started, but you have to put in the time and effort to make sure they get the tender, love, and care that they so desperately need to thrive.
If you are a first-timer, you will learn the best strategies on how to grow a watermelon the right way. And if you are an experienced gardener, these tips can serve as a reminder and good point of reference.
Choose The Right Variety
When choosing the right variety, you need to take into consideration the climate you have in your area. Watermelons thrive in warm conditions, and if you live in a place that has shorter summers, it is best to grow compact varieties, such as Sugar Baby watermelons. These picnic melons mature in about 70 to 75 days, compared to having larger types that would otherwise take 85 to 100 days to fully mature and be ready to harvest.

Our Recommended Varieties Of Watermelons
Sugar Baby
A popular variety among gardeners worldwide, this particular watermelon is known for its high Brix value of 10.2. The Brix value is a measurement of soluble solids within fruits, juice, and vegetables. In other words, it’s the basic sugar content in your foods.
Despite their small size, they are incredibly sweet and are some of the most flavorful among all of the varieties below. They are small and round watermelons that can conveniently fit in a refrigerator, making storage a total breeze! This variety weighs in around eight to ten pounds and has a dark green color with slightly lighter veins.
It has a sweet, red, and ripe flesh with black seeds. They do best in Mediterranean climates due to their large, sun-loving foliage. The vines can reach up to 12 feet, producing at least two mature melons in a single cycle.
Sweet Beauty
Sweet Beauty is similar to the Sugar Baby in terms of color and weight but comes in a larger oblong shape. This variety can be harvested in about 75 to 80 days from planting. You can opt to sow the seeds into the soil directly or start indoors and transplant your seedlings after the last frost. They are a hybrid of the Sugar Baby, which explains its similar features. It also has deep red flesh that is relatively sweet and refreshing.
Golden Midget
The Golden Midget was developed at the University of New Hampshire in 1959. It took about ten years for Elwyn Meader and Alber Yeager to successfully grow the first one. What makes this watermelon so unique is the fact that it’s a cross between a New Hampshire Midget and a Pumpkin Rind.
The Golden Midget is famous for its golden yellow color, pink flesh, and short growing season. It’s much smaller than the Sugar Baby, weighing just three pounds, but is as sweet and juicy as its greener counterparts.

Decide On How You Want to Get Started
There are three ways as to how you can get started: direct seeding, seeding indoors, or by merely transplanting one from your local garden center. We highly recommend transplant seedlings, as it’s quite a bit faster and generally more convenient all around. But your next best option, if you have the spare time and access to good seeds, is sowing the seeds yourself. Though, we still recommend getting started indoors and moving them to your garden once the seedlings are ready.
Sow Seeds Indoors
You can sow the seeds directly outdoors too, but this can be quite tricky and may not yield healthy seedlings. It takes a whole trial and error process to master this technique, especially when you start planting right after the last frost. Sowing indoors or in a greenhouse will allow you to regulate the temperature better and maintain it until the seeds germinate.
Free Up Their Roots
It is essential to know that watermelon plants have sensitive roots and do not like to be disturbed. So if you do get your seedlings from a garden center, choose the smaller ones. These would have smaller roots that can quickly adapt to new spaces. Before transplanting, carefully remove your seedling from its container and loosen the soil up before placing it in a transplant hole.
Plant Them At The Right Time
Timing is everything when it comes to gardening. Be cautious when transplanting your watermelon seedlings while the weather is still cold – they can stop growing and eventually die off.
Wait for a couple of weeks after the last frost or preferably when nighttime temperatures are consistently clocking in at 60 degrees Fahrenheit or above. Being native to hot climates, these babies grow best in warmer conditions. That’s precisely why it’s the perfect summer fruit!
Find The Right Spot in Your Garden
Before anything else, take a good look at your garden and figure out which part has the most exposure to the sun. Ideally, your watermelon bed should have access to eight to twelve hours of heat and light for optimal growth. Remember, they love the sun, and the sun will be your new best friend for the next few months.
Ideal Temperature
As we said previously, watermelons grow best in warm weather. These fruit-bearing plants are native to Africa, where the temperatures can easily reach up to a smoldering 100 degrees Fahrenheit. Although watermelons can endure heat, the ideal temperature is anywhere between 60 and 80 degrees. Anything lower, and it will stunt their growth.
If you have summers that can get extremely hot, this too can slow down their growth. Typically, anything above 80 degrees Fahrenheit will turn the growing watermelon patch into a small, blander harvest. So be sure to check the forecast before you plant your seedlings to avoid a heap of work gone to waste.
Make Most Of The Heat You Have
Do you live in an area that doesn’t get hot much? Don’t worry just yet! During nightfall, you’ll need to retain the warmth of your soil. The best approach is to accentuate the sun’s rays to your absolute benefit to trap heat in the soil as the day comes to a close. You can cover the bed with black garden-grade plastic or row covers to do this. However, this should be done during the initial week or two when your plant is in its budding phases. Just make sure to remember to remove the cover during pollination to allow the bees to do their jobs.
By the time the fruit starts to develop and mature, you can place them back to make sure your soil stays warm and cozy for your plants.
Try Vertical Gardening
The most common misconceptions with these fruits are that watermelons are only low-growers due to their large weight, ranging from three to ten pounds per piece. Intuitively, it seems unlikely to have them grow vertically. But you sure can!
You’ll need to build a watermelon trellis, which will allow the vines of your plant to creep up rather than crawl over the ground. It can also be a great space-saving technique, especially when you don’t have much ground to spare. Plus, it will keep your leaves off the moist soil, which will curb diseases and keep your fruits out of reach for common pests.

Good Soil Gives Sweet Fruits
In photosynthesis, the leaves of the plant produce the sugars from the nutrients that the roots acquire. These sugars are technically the plant’s “food,” which is transferred into the fruit as it matures.
A great sign that your plant is getting enough sugar is foliage growth, which indicates high Brix values. So if you want tasty and delicious fruits, monitor your plants for thick and full leaves. Ensure they have proper water intake, adequate sunlight, and warm soil temperatures.
In addition to this, to promote optimal growth, the soil should be moist and packed with nutrients such as bone meal, compost, or better off, worm castings.
Raise the Bed If You Have Heavy Clay Soil
If you are unable to get loose soil, it helps to at least raise the bed by creating mounds. Heavy clay soil tends to retain more water, which can lead to your watermelon’s roots rotting. Having a mound system improves drainage and prevents the roots from sitting in a pool of water each time that you hydrate your plants.
It also helps give your melon a bit luxury while you compost, as it allows for a gradual release of nutrients. Mix the soil with fertilizer and break away any clumps that you may have. Preparing heavy clay soil the right way is an essential step before planting, especially if it is your first time growing watermelons.
Added Nutrition
Watermelons are heavy feeders. With their hearty appetite, you need to feed them with a continuous supply of nutrients. As mentioned above, prepare your soil with compost and slow-release fertilizer that contains phosphorus and magnesium. Also, feed your watermelons with a diluted form of fish-meal to provide sufficient nutrition, hence, helping you avoid any growth defects, undersized fruits and a harvest that has little to no taste to speak of.

Below, we’ll give you a better understanding of what significant nutrients your watermelons depend on and talk a bit about why they’re so important.
Nitrogen
Nitrogen is a critical element for plant growth and is found in plant cells, proteins, hormones, and chlorophyll. It is the primary building block for the plant’s entire structure. Without nitrogen, the plant will have stunted growth, and the leaves will become pale green or yellow.
It is almost mandatory to mix a small amount of organic nitrogen, such as the kind you’d find in most compost or fertilizers, into your soil. You don’t need a set schedule, but you’ll need to stay mindful of the soil conditions and give it a slight boost at your due diligence. But keep in mind, excessive nitrogen content will only be counter-productive and won’t nourish the fruit whatsoever.
Phosphorus
The role of phosphorus is to essentially transfer energy from the sun to the plants, as it enables the process of photosynthesis. It is also responsible for stimulating root growth, which is very important in the whole process of a plant’s development. Manure from grain-fed animals is the most reliable source of organic phosphorus. However, you can also get this element from different organic fertilizers like bone-meal or worm castings.
Potassium
With potassium, you are increasing your plant’s resistance to diseases and improving the quality of the fruit it bears. It is not commonly available in soil, but you can bolster the content with potash and other potassium-rich fertilizers.
Magnesium
Magnesium is a critical component of chlorophyll. Without magnesium, chlorophyll cannot convert the sun energy into the form of energy a plant uses to function. Deficiencies in magnesium occur when the soil is too acidic, or when there is an overload of potassium fertilizers applied. You can overcome this deficiency with a mixed magnesium-calcium carbonate called dolomite or even by Epsom salt as a supplement.
Calcium
Plants need calcium too. It is vital for root health since it helps with the development of new roots and root hairs. If your soil has little to no calcium, you can add dolomite to your fertilizer mix. But, be sure not to use it for long periods of time, as it can cause soil imbalances.
Sulfur
Plant proteins are developed through amino acids, and sulfur is one of the main constituents of these building blocks. This element, in particular, is involved with energy production and is responsible for the flavor and odor compounds in plants. Plants with strong smells like onions require sulfur-rich soils. In this case, a relatively moderate amount will do well for growing watermelons.
Soil pH Preferences
It’s a well known fact that different plants require different acidity levels. Having the wrong soil pH can kill your plants, and that’s the last thing you’d want to happen. Like most fruit-bearing plants, melons prefer an almost neutral pH level, which falls right between 6 and 6.8.
To check your soil pH-level, you’ll need a test kit or a soil meter. You can easily buy either one online or at your local garden center. It is much better to have this with you to check your soil thoroughly for any deficiencies. Most of these kits and meters will even show you each macronutrient present in the ground to help you gauge which nutrients you’ll need to balance out and what fertilizers you should opt for to grow a great watermelon harvest.

Don’t Overcrowd Your Melons
Watermelon roots love a good stretch. A lot of seasoned gardeners call them space hogs due to the nature of their growth and how they prefer to be far apart from one another.
When planting seedlings, small varieties would need to be three to five feet apart from each other, whereas larger ones require six to twelve feet of space in between. If you do choose to grow them vertically, two to three feet should be enough room.
When planting, the depth of your hole should depend on the size of your seedling’s roots. Dig a hole that can accommodate them comfortably and loosely cover the hole with compost, mulch, and soil. If your hole is too shallow, the plant will not be able to support itself properly, and you’ll end up exposing the roots after a while.
Proper Watering Techniques
We cannot stress this enough: your watering techniques play a huge role in the healthy growth of low-growing plants like watermelons. Overly wet soil can destroy your foliage and fruits. There’s nothing more disappointing than seeing a soggy melon rotting on the ground just when you’re about to harvest.
Choose a drip irrigation system when watering your watermelons; this way, water is equally spread directly onto the bed. With this method, you don’t get the leaves wet and avoid the growth of mildew, along with a wealth of nasty fungi.
You need to water your plants with at least a gallon per week, depending on the weather you are having. Your schedule must also be consistent. It’s also a good idea to water your plants in the morning – that way they have an entire day to gradually absorb it.
Pesky Pests!
There are several different pests you may have to do battle with depending on your climate and geographical location. The most common ones are aphids and ants. Aphids can be quite destructive, and wherever they are, ants will generally follow suit.
But there is a sure-fire way to keep them at bay – neem oil.
This organic pesticide can suffocate and repel various insects in different stages of life with its strong smell. Simply apply the oil onto the leaves every two to three days, and you should be good to go!
You may also choose to place ant-traps around your melon bed to get rid of any colonizing invaders. Making one is quite simple, and you can find the neccessary ingredients at home. Just mix one part of borax with an equal amount of sugar, and water.
Combine the ingredients until pasty, and place the mixture on a flat container which you can keep in close proximity to your melon bed.
Curb Fungus
If your area is generally moist or you live in the tropics and summer rain cannot be avoided, you may want to make good use of some worm tea. This concoction is great for curing mildew and stopping all sorts of other fungi that can cause harm to your plants. It coats your plant with a protective film that stops any fungi from developing. And it’s an excellent pest repellent too!
Proper Pruning
There are a lot of mixed opinions about pruning. With that said, pruning can aid in getting the best fruit yield per plant. If we revisit our point on photosynthesis, we know that the stems and leaves help distribute the nutrients to the fruit.
If the plant has more than three fruits at a single time, all the nutrients and sugars will be distributed and would thin out. By pruning some of the blossoms, you are eliminating new fruits from developing and allowing your plant to focus on one or a few at a time. This gives your fruit a higher Brix value, making it sweeter and juicier once it matures.

Flower Facts
Watermelon vines produce both male and female flowers separately. They start by producing male flowers first, before their female counterparts. Sometimes, the male flowers do not fall off after they bloom, but this shouldn’t be a cause for concern.
Fertilizers play a considerable role in promoting flower blooms. Use a liquid soluble fertilizer and start with a 20-10-20 (N-P-K) measurement until your plant starts to blossom. Switch over to a 20-20-20 fertilizer for the rest of the season. And don’t forget to follow the instructions indicated on the packaging for optimal effects.
Be Kind To Bees!
To encourage fruit production, fertilizing the female flowers is of utmost importance. Take a moment to appreciate our pollinators; bees, butterflies, and birds. Let them roam your garden freely!
However if these critters aren’t abundant where you live – you can also pollinate your melons by removing the male flowers and swiping them over an open female flower. You can quickly identify the two flowers by their morphology. The male flowers are quite small, whereas the larger female flowers have a swollen base.
Protect Your Fruit
Whether you choose to grow your watermelons on a bed or vertically on a trellis, you need to protect your fruit when it begins to mature. You can easily make a watermelon sling to provide support and physical protection to your fruit with different materials, whether store-bought or recycled. You can use old t-shirts, cheesecloths, or even old stockings for this! As long as the fabric is stretchy and breathable, it will work great.
Know When To Stop Watering
Watering during the plant’s growth is quite essential, but as your fruit reaches the final stages of ripening, you need to cut back on the water. Excess water will dilute the sugar content and make your fruit taste bland. During this phase, you’ll only need to give it enough water to keep its leaves from entirely wilting – that’s it!
Harvest When Tendrils Are Dry
There are many ways to check if your watermelon is ready to harvest. The age-old knock-on-the-fruit technique has been put to good use by many, but you need a well-trained ear to figure out if it sounds hollow or not. One sure-fire way to figure out if your watermelon is ready is to locate the closest tendril to your fruit. Once it has withered and turned brown, your fruit is absolutely ready for you to harvest.

If you have tried growing watermelons in the past but didn’t have much luck in actually harvesting one, these tips should definitely help point you in the right direction. With just a little bit of love, time, and effort (along with a couple of our tips), you’ll have the perfect juicy watermelon just in time for this summer!


