How To Make Homemade Plant Food
It always feels rewarding whenever you can make something yourself rather than buying it from the store. But beyond the DIY feel-good warmth, when you make your own plant food, you can avoid some of the chemicals that the brand name plant foods use in their formulas. Below is a complete rundown of how to make organic homemade plant food to save some cash and keep chemicals out of your garden.
Composting
The first way to feed your plants with the nutrients they desire is by creating a compost bin. If you want to be a serious gardener, you will want to build a compost system as soon as possible. With a composting system, you will always have a fresh supply of premium soil mixtures that can feed your garden all throughout the growing season. Creating your own compost can be completely free, and all it requires is a little dedication to get the system down.
A compost pile is made up of two main parts: green matter and brown matter. Your composting system will flourish when the brown matter outweighs the green matter at a ratio of 4:1. Sources of brown material include dried leaves, coffee filters, tree bark, twigs, and cotton. Sources of green material include grass clippings, fruit scraps, vegetable scraps, coffee grounds, and tea leaves.
Turn the pile over once a week for about two months. The reason for turning it this frequently is that the pile will start to build heat, and you want to distribute that heat evenly throughout. The most efficient method of composting is to have three bins sitting next to each other. You will see this referred to frequently as a three-bin setup, which comes with the benefit of not having to continually turn over an ever-growing pile of compost.
Here is how a three-bin compost system works:
The first bin is where you will start putting fresh composting material. Remember to use a ratio of four parts brown material to one-part green material. Once you notice the composition of the first pile start breaking down, transfer it to the second pile, and wait for it to finish composting. When the second pile is finished breaking down, move it to the third bin. The third bin is where you’ll have fresh compost continually ready for use. While the process is ongoing, you will continue to add new compost material to the first pile, and the process begins all over again.
Here’s a more detailed look at the stages of each pile:
First Pile
Over the course of a couple of weeks, fungi and bacteria will start to break down. During this stage, the heat of the pile begins to build, so you should turn over the compost now and then to spread it out evenly. You may need to wait up to a month before you start to see recognizable compost.
Second Pile
The second stage is the finishing period. You won’t need to do much at this point but wait and periodically check to see if the material is finished.
Third Pile
You will be able to tell that the compost is ready to be put in the third pile once the material starts to look the same. The finished compost will look like dark soil. Once the compost is finished, you’ll move it over to the third pile, where it will be ready for use.
If at any time you notice your compost pile becoming dry, spray it down with water. You always want to keep the pile moist, so don’t be shy with the hose.

Make Compost Tea
What is compost tea? It is the secret ingredient that will surprise and delight your plants into growing faster and tasting better. The tea is brewed using a combination of water, oxygen, and compost material. There are many ways to make compost tea, and all of them result in a quick and easy fertilizer for your plants. Two main systems exist for brewing: passive compost tea and aerated compost tea.
Here are the items you will need to brew your first batch of compost tea:
- Finished compost
- Five-gallon bucket
- Air pump (for aerated tea)
- Burlap sack or a different straining material
For the passive system of brewing compost tea, you simply add a ratio of five parts water to one-part compost material and wait for it to brew. If you have a burlap sack, you will place the sack in the five-gallon bucket and then pour in the mixture. If you do not have a sack, you will want some type of straining material to place on top of the bucket. The mixture will have to steep for a couple of weeks, and you should stir it every other day.
The aerated system is more involved but it’s also much quicker. For serious gardeners or those who have a plethora of plants to feed, you can investigate buying a commercial compost tea brewer. For everyone else, all you will need is an air pump to oxygenize the mixture. The bigger the bucket, the more powerful of an air pump you will need. For a five-gallon tank, an 18 watt pump will work.

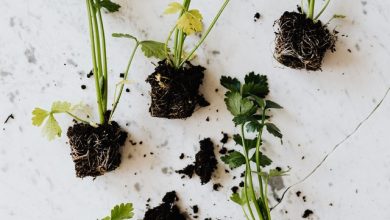
How to Make Homemade Plant Fertilizer
Plants receive nutrition from sun, water, and soil. But over time, the nutrients in the soil get depleted, which is why we must continue to fertilize plants to keep them happy. Luckily, many of the nutrients that plants need can be found in items already in your home.
The three main nutrients found in fertilizer are potassium, phosphorus, and nitrogen. When you look at fertilizer, there will be three numbers that identify the amount of each of these nutrients, such as 15-15-15. The first number is nitrogen, the second is phosphate, and the third is potassium. You may see this referred to as NPK, which refers to how the nutrients appear on the periodic table.
The other two elements your plants may desire are magnesium and calcium. So how can you find these five elements in your pantry? Grab some baking soda, Epsom salts, ammonia, and water.
Ingredients:
- One teaspoon of baking soda
- One tablespoon of Epsom salts
- Half a teaspoon of ammonia
- One gallon of water
A plastic milk jug will work well for storing the mixture and for applying it to the soil. Mix everything together and let it sit for about an hour to ensure everything fully dissolves.

How to Make Homemade Plant Food
This plant food recipe can help specifically with acidic soil where you want to raise the pH levels. Most plants prefer a more neutral pH level between 5.5 and 6.5. To find out the level in your soil, you can buy a testing kit from your local hardware store or nursery. You should also be able to find the following ingredients at the same store.
Mix together:
- Four parts seed meal (or grass clippings)
- One-quarter part agricultural lime
- One-half part dolomitic lime
- One-quarter part gypsum
- One-part bone meal
- One-part kelp meal
What Nutrients Do My Plants Want?
The plant food and fertilizer described above will work as all-purpose supplements for your plants. But some plants may need specific nutrients to survive and thrive. Luckily, our plants tell us exactly what they require based on their appearance.
Look out for the following signs of a nutrition deficiency:
Nitrogen Deficiency
- Signs – Stunted growth and yellow leaves or pale green leaves are signs of nitrogen deficiency.
- Solution – Coffee grounds are a great source of oxygen and likely can be found in your kitchen right this moment. Beans and peas are also rich in nitrogen and might be found in your pantry.
Phosphorus Deficiency
- Signs – Leaves may look like they are dying with darkness around the edges. Absent flowers and stunted growth are also signs of a phosphorus deficiency.
- Solution – Adding bone meal directly to the soil is an efficient way of adding phosphorus. An out of the box option is adding used fish tank water, as long as it is not saltwater.
Potassium Deficiency
- Signs – Leaves will have brown edges or brown spots. The veins of the leaves will become yellow.
- Solution – Banana peels are the perfect household item to add potassium to your plant. Bury the banana peels an inch below the soil.
Magnesium Deficiency
- Signs – The edges and veins of the leaves will become yellow. The leaf may have a marbled look.
- Solution – Epsom salt is an efficient solution for adding magnesium. Add a handful of salt to the top of the soil before watering. Epsom salt can be an effective plant food for peppers and tomatoes.
Calcium Deficiency
- Signs – Calcium deficiency will appear as a combination of every sign mentioned above. Yellow spots will appear between the leaf veins. In addition, brown edges and spots, as well as a marbled look, can signify a calcium deficiency.
- Solution – Crushed eggshells are the easiest way to add calcium to your plants. This is a slow-acting method, so crush the shells well and till them into the ground around your plants.