How to Prepare Your Garden for Winter
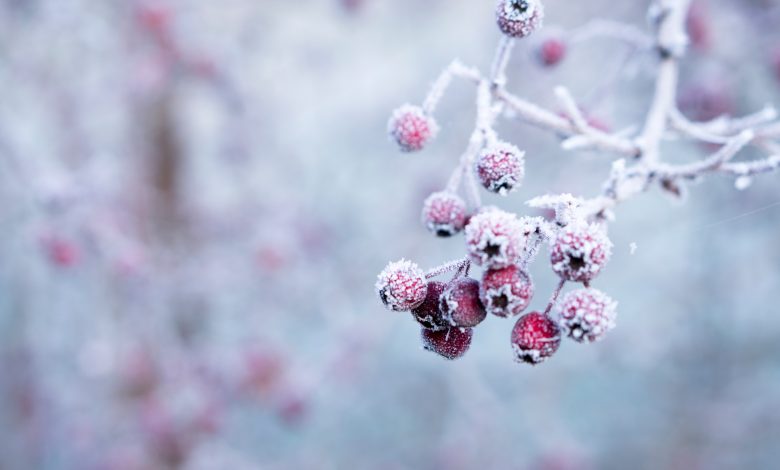
Just because winter brings snow, ice, and freezing temperatures, it doesn’t mean you should abandon your garden altogether. For months, you have been taking care of your flowers and plants to ensure they grow to their maximum potential. If you don’t properly plan for wintertime, all of your hard work is going to go right down the drain. At the first sign of fall, you should start getting your winterization plan in motion. Protecting your garden before the first frost hits is critical to ensuring you have an excellent growing season the following year.
As the leaves start falling from the trees, all gardeners should take this as a sign that cold weather is coming in the next few weeks. The cold comes in quickly, and if you are not prepared, it could stunt your plants’ growth. However, there are specific steps to take to make sure you are doing everything possible to encourage future development.
Cut Back on Fertilizer
Even though we’re not mentally ready to think about winter at the end of the summer, there are still some tasks that should begin for garden preparation. The first is to cut back on using fertilizer.
Fertilizer promotes growth, but your plants shouldn’t be pushing for more growth when temperatures are going to be dropping. New growth that happens too late in the season will not have enough time to harden off.
As a result, those additional growth areas will be weakened in the winter and likely be ruined by the temperature and high winds. Additionally, a plant that has some weak points can expose the rest of the plant to other health issues as well.
Instead of fertilizing your plants, you can begin to water them consistently before the frost. This is especially important if there has been little rain in the forecast. Keeping your plants well-hydrated means that they will be healthier and stronger, and this gives them a better chance to survive the winter.
Clean Up
The first step to take as soon as fall arrives is to start cleaning up any dead or rotting plants and leaves. This process is beneficial in a couple ways. First, when it comes to appearances, your garden should always look neat and tidy. Having dead plants and flowers in your yard takes away from the overall look of your plot. Take care when raking up dead leaves. You don’t want to ruin the roots or stems of healthy flowers in the process.
Second, cleaning your garden helps keep insects and disease at bay. Old or rotting plants can carry funguses and such that can ruin your thriving plants if left untended for too long. Insects that have been feeding on your leaves and flowers throughout the spring and summer may have laid their eggs already. Removing dying and dead plants can eliminate the majority of the invaders from coming back the following spring.
When you rake up the leaves and plants, do not bury them or keep them as compost if they are not free of disease. Either bag them or burn them to get rid of any potential risk.

Start Weeding
After you remove the decaying material, it is now time to pay attention to any weeds that could still be growing on your plot. If you have been fighting with weeds all summer long, now is the time to get rid of those invasive and unwanted plants. Dig the weeds up from the roots and bag them up. If you place them in your compost pile, they still have the potential to take root and grow, so it is best to just throw them away.
When you have dug up all of the visible weeds, take some time and go row by row to address any stragglers that could be hiding among your plant stalks. Weeds are tough vegetation, and they can come back to grow in your garden once spring comes back around if they are not addressed now.
Trim and Divide Your Perennials
Perennials are plants that live for more than two years. They include flowers like peonies, hydrangeas, and asters. If you have vegetables in your garden, tomatoes, rosemary, and basil all fall under this umbrella.
Plants should be cut back until you have around five inches of stalk left from soil to tip. However, be very careful when it comes to the timing of trimming your perennials back. Wait until the plant dies to do any paring. These plants transfer energy from the top of the plant to the roots before they die. That way, energy and nutrition are stored in the root systems for the winter. When you cut a perennial too early, this process is stopped, and the plant may not come back next year.
Why do you need to divide your perennials? It is a proven way to shape up your garden before winter comes. Plants and flowers that have multiplied rapidly can take over significant areas of your garden. This quick growth means they are competing with other flowers for water, good soil, and nutrients. It’s easy for the larger perennials to starve other plants to keep them healthy and growing.
Dividing perennials is necessary when they have grown out of their original planting spot. When you start this process, make sure the plants are well watered. Use your gardening tools to loosen soil and dig up the plant. Brush off any excess dirt and start dividing. Lay the plant on a tarp to assess where you want to make your cuts. Using a knife or trowel, cut the clump in thirds.
Then, you can replant each divided section. Make sure when you replant the perennials in another location that the hole is the same depth as the one they were growing in. Spread well-fertilized soil over the plant and water well. You can use a thin layer of mulch for protection. Keep an eye on the divided perennials and make sure the soil is well-drained and moist. In a few seasons, you are going to have impressive blooms all over again.
Dispose of Annuals
If you have any annuals in your garden that have seen their day, it’s time to get rid of them. These dying plants, especially rotting ones, need to be pulled as soon as your viewing season is over.
Pests will already be looking for places where they can move in for the winter, and rotting plants will be very attractive to them. Pull these out from the root and dispose of them in a brown bag. Any plants that are dead but which are disease-free can be buried into the soil if you wish; this can help add some beneficial matter to the soil for spring.

Get Your Soil Ready
A lot of gardeners wait until spring comes back around to tend to their soil and don’t know that fall is also a good time to prepare the ground. After you have cleaned up the decaying debris from the earth, loosen up any compacted soil and add in some compost, manure, or other natural fertilizer. If you include this material now, the compost has a few weeks to breakdown and enhance the soil.
This way, when spring comes, you don’t have to wait for the first thaw to arrive. You do not have to worry about waiting for your soil to dry, either. You’ve already done a good majority of the work now to prepare the earth for future use. If you till your land, you can also do so in the fall. Early tilling helps with drainage and activating the ground.
Don’t Protect the Ground Just Yet
After you lay your compost down, you may be tempted to put another protective layering on top. Don’t do so just yet! If you lay down any pine branches, leaves, hay, or the like, you are inviting critters to come and nest in the warm material. Animals like mice and moles can also eat any roots or bulbs as they make a home for themselves. Wait for temperatures to dip to near freezing. This pause allows the animals to find another place to go that is far away from your garden.
Leave Winter Plants Alone
Any plants that you included in your garden to withstand the winter should be left alone. Of course, you should cut back any dead leaves or stalks but also allow them to continue to grow freely. Winter flowers like pansies, snowdrops, and winter honeysuckle are all great plants to leave in your garden. Make sure you do ample research if you are unsure if you have any flowers or plants that can stand the cold.
If the thought of having winter plants interests you, consider planting cover crops after you get your soil composted. Early fall is a great time to start planting. Plants like clover or vetch act as a great form of protection from soil compaction and erosion. Also, their presence helps increase the amounts of organic material that is present in the soil when the first freeze comes. In general, these plants should be in the ground a couple of weeks before then, but some of these cover crops can withstand winter temperatures. Depending on your needs, find the right plant for your garden with a thorough study.
Plant Spring Bulbs
The flowers of spring bulbs will be long gone by the time you’re winterizing, but if you’ve taken out those bulbs for re-planting, now is the time to do it. If you noticed they were too close together in the spring, you can separate them now and spread them out around the garden. These kinds of bulbs include tulips and daffodils.
For flowers that blossomed more recently, you can begin to dig up and relocate those bulbs as well, if necessary. Be sure to dig a few inches around the bulbs to safely loosen up the soil. You can immediately transport some of the bulbs to another location if they appeared to need more space.
Spring flowering bulbs like tulips and crocuses should be planted in the fall. This method gives them enough time to get rooted in the soil before winter comes. When you plant the bulbs, make sure the depth of the hole is three times the height of the bulb. It gives them ample room to grow and mature. Watering the soil isn’t necessary, but it is a good idea. Not only does it allow for the bulb to soak in the water it needs to make it through winter, but it also helps to stabilize them into the ground quickly. It also makes it harder for animals to dig at the ground when it is frozen over.

Remember Your Trees
If you have evergreens in your yard, make sure to soak the trees well, especially if you have experienced a dry fall. The evergreens include conifers, boxwoods, and hollies. They are sensitive to winter burn, so give them extra water when needed. These trees are known to release moisture through their leaves year-round, so you may have to go outside throughout the winter and check on them to make sure they are not suffering from a burn.
Young trees also need maintenance. Fruit trees have thin bark that can crack and peel under extreme temperatures. If you feel your tree could be susceptible to the fluctuating temperatures, purchase tree tape or tree protectors to shield them from the cold and ice.
You can also protect smaller trees and larger shrubs with burlap or a similar fabric. Wrapping them is especially necessary when your region has regular prolonged freezes. If you prefer more rigid protection, you can build a teepee around the tree or shrub. Then you can cover the structure with breathable fabric when winter comes.
Regenerate Your Compost
The fall is also an ideal time to stimulate your compost. Any material you have composted over the summer should be used on the soil of your garden bed. As stated previously, adding essential nourishment to the ground can only help your gardening during springtime.
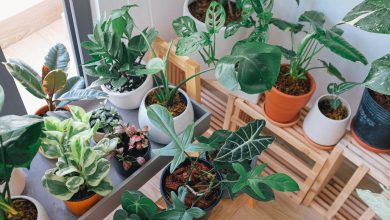
Building a fall compost heap can be done once you clear your previous batch. Leaves, straw, organic food scraps, and other materials make for a great starter kit. The compost can be used for your winter flowers, or it can even be taken indoors to feed your house plants. Don’t pass up this golden opportunity to compost successfully.
If you’ve had that compost sitting through the summer, there’s a good chance it is ready to be utilized now. Don’t let it sit dormant all winter long. Use this rich substance to feed your gardens before the frost falls. Top up garden beds and spread it around your lawn to give the soil a much-needed pick-me-up when spring comes around.
If you want to wait a little longer before you use the compost in your garden, give it some extra love by adding your collected leaves, yard debris, kitchen compost, and sawdust.
After you add your compost or natural fertilizer, cover the garden bed with a plastic tarp with holes that is designed for outdoor use or natural ground cover. The tarp prevents rain and snow from washing all of your work away. Remove the plastic sheet when you are ready to garden in the spring.
Mulch the Area
Mulch is a tricky thing to incorporate into your garden in the spring and summer; in some cases, it suffocates plants and inhibits oxygen flow through the ground.
However, when it comes to winterizing, mulch can be a very good friend to your plants. A layer of mulch in the wintertime will help to insulate the soil beneath it, and it will provide a protective barrier between the ground and the frost.
Mulch can also help to keep in heat and moisture. Non-compacting mulch is best, like straw, chopped leaves, or shredded bark.
Winterizing Fertilizer
You need to stop using regular fertilizer at the end of the summer; however, there is a winter version that can do a lot of good for your dormant plants.
If you are going to fertilize in the winter, you must be very aware of your timing. There is a window when this kind of feeding is acceptable, usually being the most effective when applied between October and November.
Follow the Weather
When it comes to winterizing your garden, the worst thing you can possibly do is start too late. Some plants are very sensitive to frost and will benefit from being protected weeks before the chilling sets in.
That being said, if you’re going to winterize properly, it’s important to pay attention to the coming weather patterns in your region. If you know that temperatures will be dropping in the next few weeks, you should begin your winterizing as soon as possible.
It is not the be-all and end-all of your garden if you are a bit behind, but it will be a much more comfortable process if you can work outdoors when the weather is less foreboding.
Winter Review
Now that your garden has been winterized, the work shouldn’t stop here. Although you may not have much to do outside, this is the time to take out your notebook to write down some valuable information.
Go Over Your Growing Season
Sit down and go over how well your garden did this season. Were there some plants or flowers that grew well and in abundance? Were there plants that struggled to root and grow? This moment is the time to rethink about using those underperforming plants again, especially if you followed the appropriate growing techniques. Plants that struggled despite your proper care and maintenance may have to be replaced with something else.
Write a running list of the plants that did well and the ones that didn’t. Take good notes when writing down descriptions and details. You want to remember everything when spring comes. If you feel any plant failure was the result of something out of your control, you can try again next season. Make sure you write down what needs to be changed to ensure a better chance at survival.
Clean Your Garden Tools
You can also take this time to clean your tools. Over the spring and summer, there is no doubt that your gardening supplies were well used. All of your tools should be properly cleaned and sharpened if necessary. Any loose screws of handles should be fixed, or you might even need to purchase upgrades if your tools have seen their day.
Get some warm and soapy water and a good scrubbing sponge to apply to your tools. Clean off dirt and other sediments, and air dry in your shed or garage. If dirt and debris are thick, remove it with some sandpaper. Sharpening should be done carefully, and a simple mill file will suffice with your smaller tools. Lastly, tools will do well to be lightly oiled before they’re put away for the winter. Dip a rag into some light oil and rub the entire surface of your metal tools. This will help to keep them in prime condition and ready for spring.

Winter Flowers
After your garden is taken care of, grab your favorite garden book, and figure out what winter plants you may want to plant next year. There is a wide variety of flowers and plants to choose from that can make your yard look cozy and inviting, even during the dead of winter. Here are is a list of plants to mull over if you are still undecided:
Winter Jasmine: Winter jasmine blooms in January. This plant is one of the earliest flowers to show their buds. The winter jasmine is a fun flower to plant because its yellow hue injects some cheerfulness into a gloomy winter. Establishing this plant is simple, and its life span is long.
Amaryllis: The amaryllis plant is also easy to grow. Bulbs should be packed in the soil a few weeks before the first freeze, and that’s all that is needed. If you plant the amaryllis in late October, you can expect your flowers to bloom by late November or early December.
Buttercup: Buttercups are winter’s perfect flower. Not only do they grow well during the colder months, but they look stunning when they do. The blooms resemble that of roses, and they can come in a variety of colors. All they need is well-drained soil to ensure they come back time and time again.
Camellia: Planting Camellias in the spring or fall is the preferred gardening method for these flowers. When planted, allow a few weeks for the root system to take hold and mulch regularly. Camellias can be fickle when they start sprouting, so make sure you keep the soil moist and cool. When the first freeze hits, the bulb should be hydrated well, which encourages winter growth.
Winter Primrose: The winter primrose comes in an array of colors and adds a bit of life to a snowy and dreary winter day. They grow in with fullness and are quite stunning to gaze at out of your kitchen window.
Snowdrop: The name says it all. These gorgeous flowers are droplet-shaped and first appear in early to mid-November. The white petals look gorgeous against an icy backdrop. The snowdrop’s lifecycle lasts about six to eight weeks, although some rarer varieties can keep growing through February.
Pansy: Pansies are flowers that are low growing. They are a winter garden staple and bloom through the majority of winter. You can choose from a variety of colors, and some pansies even have a bi-colored pattern if you want to step outside of the box.
Hellebore: The hellebore is also known as the Christmas rose because of its similar appearance to the famous flower. This unique bloom can be planted in either early or late winter, depending on where you live. Its root system is deep growing, which creates a hardy plant that can withstand almost anything winter throws its way.
Plant Cover Crops
If you’re ahead of the game with your winterizing plans, you might take some time to plant cover crops in the warm fall months. The goal with cover crops is to return organic matter to the soil after much of it has been taken away with harvesting.
As soon as you pull your last vegetables, you’ll notice that soil levels decrease dramatically. To give your soil a leg-up throughout the winter, cover crops can help.
These kinds of crops include buckwheat, clover, and fall rye. There are all kinds of benefits to planting these items, including their ability to control erosion, restore nutrient levels, and enrich soil levels for springs arrival.
Depending on where you live, some cover crops will eventually die during mid-winter. Fortunately, their leftover residue will still be beneficial to the spring soil.
Some cover crops you might consider planting include:
- Hardy Legumes: Legumes will take their time in the fall and begin to grow quickly in the winter months. They will provide the soil with excess fertilizer and organic matter. Cut them down in the spring, before they begin to flower. Hardy legumes include crimson clover, field pea, and berseem clover.
- Grasses: Cover crops like grasses easily tolerate colder weather and improve the structure of compacted winter soil. Grasses can also control erosion and increase organic matter. Cut back grasses in the spring and till them under. Examples include oats, barley, and winter rye.
If you’re implementing cover crops as parts of your garden winterization, then you’ll want to pay very close attention to the environment you’re working with.
For example, if the winter has been very wet, you’ll want to turn the cover crops earlier than normal to release some of the moisture they’ve been holding under the soil.
If you don’t have time to plant cover crops, you can also add a layer of fall leaves to your soil. The leaves will block weeds from growing through the winter, and you can mix them into the soil in the spring.
Keep in mind, leaves will be more susceptible to blowing away, so you’ll need to weigh them down with netting of some kind.
Pest Prevention
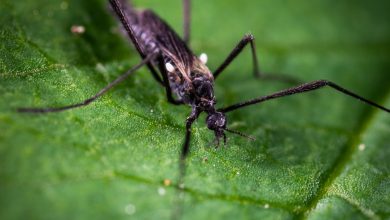
As the frost hits, another beneficial winterizing task is to work on your pest prevention. Even if you’ve never experienced a pest problem in your garden, you never know when a hoard of female aphids will find your garden appealing and settle in for the winter.
Exposing pests in the fall and winter is smart because they will not survive the frost, and hungry birds will find them delectable!
That being said, there are a few things you can do to prevent these pests from enjoying your yard while the snow protects them from above:
Expose Grubs
By now, you should have raked up any fallen leaves and garden debris from the fall weather. Now that the ground is exposed, take a garden fork and turn up the first few inches of soil.
By turning up the soil, you expose grubs to the colder temperatures. At this point, they will be in a dormant state and struggle to get back to the warmth in time to survive. You can do this in the evening, right before the coldest temperatures hit at night.
Move the Mulch
If you’ve opted to use mulch in your winterizing routine, you might notice that some bugs have taken up housing there. Luckily, there is a happy medium here.
During the coldest parts of the winter, use a rake to lightly pull back the mulch you have on your garden beds. Leave the mulch back for a couple of weeks, and then you can return it to its place. During this two-week time, any pests that have been taking over will be exposed to the cold weather and die. This is especially important if there are eggs and larvae. This kind of approach will give your soil a good cleanse.
If you wish, you can leave some areas of mulch untouched if it’s covering crops that can’t be exposed. Simply check on these areas more closely when it’s warmer for any pest infestations.
Bird Feeders
Birds that remain during the winter season will always be on the lookout for fresh food. Birds love to eat your tiny pests, and a healthy number of birds in your area will send a strong message to creatures who want to take over.
Keep birds in your garden space by adding some extra bird feeders in your garden beds. You don’t have to only hang these feeders in the trees; set up low-hanging hooks so your feeders are closer to ground-level.
If there is any movement near the surface, birds have the keen sense to dive in. On especially mild days, when snow is sparse, be sure to have your bird feeders stocked up so you have plenty of visitors to ward off bugs.
Winter Wash
Another great winterizing trick is to use a winter wash spray. This spray will be made up of a fish or plant-based oil that you can spray all over plants and trees. This spray will help to kill any overwintering pests that are lurking on your plants and trees. It will kill them on contact, or it will smother them. This spray can also help to prevent fungus and diseases from growing.

Some gardeners like to take a break when winter hits, while some prefer to keep their garden active. Whatever you decide to do this year, make sure you are taking the appropriate steps to get your yard winter ready. Your plants are going to thank you for it!