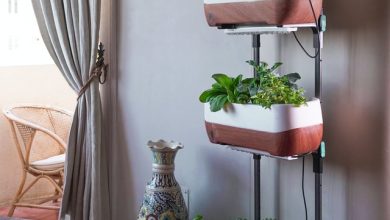
Rain Gardens: How to Create One
Rain gardens are shallow, bowl-shaped depressions in the landscape planted with deep-rooted plants native to the area or nonnative plants that are amenable to the local climate.
The gardens are designed and strategically positioned to curb the effects of urban surface run-off by capturing and retaining stormwater from sidewalks, roofs, parking areas, patios, and similar hard surfaces that don’t permit water infiltration.
People sometimes refer to rain gardens as bio-retention facilities, but bio retentions use more complex systems with engineered soils. In some cases, bio-retention facilities also treat greywater.
Benefits of Rain Gardens
Rain gardens present manifold benefits for property owners, the general community, and the environment. Below are some of these benefits:
Decrease Ambient Temperature
Rain gardens reduce the surrounding temperature by evaporation and evapotranspiration. They can typically hold stormwater for a day. A portion of this water will filter into the soil, and another part will evaporate. As the water evaporates, it takes some of the heat with it.
Some of the water that filters into the soil is taken up by the rain garden’s plants. Evapotranspiration, where water evaporates from the leaves of plants, can reduce the surrounding temperature by two to nine degrees Fahrenheit.
Thus, rain gardens are cost-effective methods of reducing the ambient temperature in urban areas, particularly those with plenty of impervious, yet heat-absorbing surfaces.
Control Flooding
Rain gardens control flooding by collecting, storing, and releasing stormwater at a slow rate that would otherwise have flowed unchecked from impervious surfaces like road pavements. In heavy downpours, such an uncontrolled run-off can cause the surrounding water bodies to swell and flood their banks.
Recharge Groundwater Aquifers
Infrastructure in highly developed urban areas prevents groundwater recharge because buildings, roads, and the like hinder rainwater from entering the ground. Rain gardens capture and store the water, allowing it to seep into the ground where it can recharge aquifers.
The rate of groundwater recharge is further increased by the rain garden plants, as the deep root systems of the plants create paths for stormwater to filter into the ground.
Habitat Creation
The rain garden provides food and shelter for local and migrating birds and butterflies. Besides birds, butterflies, and other beneficial insects that control garden pests also thrive in rain gardens.
Remove Standing Water
A properly designed rain garden drains faster than the average lawn. The garden will remove standing water in a shorter time, provided that you channel the water from the yard into it.
Reduce Mosquito Breeding
Mosquitoes require standing water to breed. Rain gardens remove standing water in the yard and drain the water within 12 to 48 hours. Mosquitoes take a longer time to reproduce.
Enhance Property Value
Rain gardens combine functionality with aesthetics and increase the resale value of the property. Also, in some states and districts, installing a functional rain garden qualifies you for tax rebates.
Decrease Energy Consumption
Even the smallest rain garden has an impact on the stormwater infrastructure. Rain gardens reduce energy consumption by retaining a portion of run-off, thus decreasing the load on stormwater infrastructure.
Also, by filtering out pollutants, run-off is significantly cleaner when it enters streams and rivers. Thus, water treatment plants will expend less energy in treating unpolluted water.
Protect Surrounding Streams and Rivers
As rain falls on the impervious roof, sidewalks, and streets, it picks up a myriad of things, including pesticides, fertilizers, automobile fluids, animal waste, and other pollutants. The run-off carries these substances into the local rivers and lakes, thus polluting the water and poisoning aquatic life.
Rain gardens retain the polluted stormwater, allowing it to get filtered as it seeps through the soil so that when the water eventually gets to the rivers and streams, it is much cleaner.

Rain Garden Design
Garden design is crucial to the success of any garden. A poorly designed rain garden won’t function optimally. Consider the following points when you decide to build a rain garden.
Location
The location of a rain garden is critical to its success. The best site for the garden is one that meets the following requirements:
- It’s at least ten feet from any foundations so that water doesn’t seep into the building.
- It’s away from underground utility lines.
- It receives adequate sunlight.
- It has a sufficiently low water table, at least two feet below the soil. Water will not infiltrate the ground if the water table is too high.
- It has a slope of not less than two percent but not greater than 15.
Size
To determine the size of the rain garden, you need to estimate the total area that will drain into the garden, such as parking areas, driveway, patios, and so on. You also need to determine if the soil is sandy, clayey, or mixed.
The size of sandy soil rain gardens should be 20 to 30 percent of the total drainage area. For example, the size of a sandy soil rain garden with a 1,500 square feet drainage area will be 300 to 450 square feet.
Clay soil gardens need to be bigger, as clay absorbs water slowly. 60 percent of the total drainage area is the recommended size for clay soil gardens.
The size of gardens replaced with rain garden soils should be 30 percent of the total drainage area. Rain garden soil is a mix of 50 to 60 percent sand, 20 to 30 percent compost, and 20 to 30 percent topsoil.
Depth
The depth of the rain garden depends on how quickly the soil can absorb water. The ideal thickness is the one that allows all water to drain away in 24 to 48 hours to avoid mosquitoes and similar organisms.
You can dig gardens with porous soils (like sandy soil) farther, as the water will quickly disappear. Less permeable soils like clay should have shallow depths. To determine the depth of the rain garden, you need to test the soil’s percolation rate. Follow these steps to check the percolation rate of the soil:
- Identify the deepest part of the proposed garden. In a simple bowl-shaped rain garden, the deepest point will be the center.
- Dig a coffee-can size hole, which is about eight inches in depth, length, and breadth.
- Use a knife or trowel to roughen the sides and bottom of the hole, as the digging tools may have made them smooth. Smooth sides may impair percolation.
- Fill the hole with water, taking care not to wash soil into it.
- After four hours, measure how much the water decreases.
For example, if after four hours, the water decreases by three inches, then the soil drains 18 inches in 24 hours. So the maximum depth of the garden should be 18 inches.
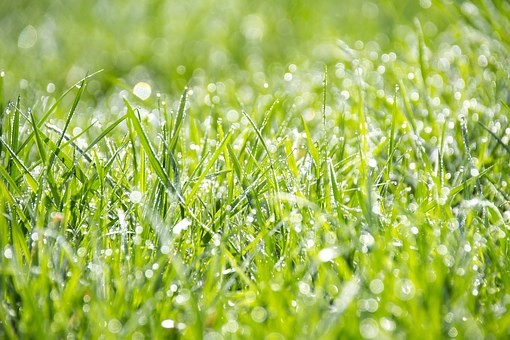
Plant Selection
For easy maintenance, grow only plants that are native to the area or are amenable to the local climate. Plant local shrubs and perennials that require little care to thrive.
Still, not all native plants are suited for life in a rain garden. Moisture-loving plants won’t fare well in rain gardens because rain gardens frequently alternate between dry and wet conditions. They get flooded when it rains and dry again after 24 to 48 hours. The best plants for a rain garden are those with average water needs.
Put plants that can grow in average to moist soils, such as foxgloves and asters, in the center. Position plants that grow in average to dry conditions on the sides of the rain garden.
Site Preparation
Before you start building the rain garden, put up erosion controls to protect the garden from sediment run-off during and after construction.
A primary cause of rain garden failure is compaction, as it reduces the infiltration rate of the soil, causing the garden to hold water for more extended periods.
To prevent over compaction, place and spread the soil while standing on the edges of the garden. Install barriers to avert foot and vehicular traffic during and after constructing the garden.

Building a Rain Garden
Dig the selected area using measurements obtained from the percolation test and the total drainage area and soil type. Sprinkle water over the dug area for 30 to 60 minutes and observe how the soil soaks up water.
The rate of infiltration will increase when plants get introduced to the soil. Still, remove three to four inches of the soil if the water drains too slowly. Replace the excavated soil with sand or compost, but ensure that the earth is dry before planting.
Remove the plants from their containers and plant them according to your design, ensuring that moisture-loving plants stay in the center while drought-tolerant plants remain on the edges. After planting, cover the rain garden with three to four inches of hardwood mulch. The hardwood mulch helps the growth of the plants by preventing moisture loss and weed growth.
Maintenance
New rain gardens require some care and maintenance to function optimally. Major maintenance areas are weeding and watering. Fertilizer isn’t necessary, as the indigenous plants should do fine in the prepared soil mix. Also, avoid using pesticides and herbicides around the rain garden.
Watering
Water the garden weekly until the plants become established. All plants, including drought-tolerant ones, require moisture in their infancy. Give the garden an inch of water weekly until the plants get established.
Weeding
Rain gardens, like other gardens, require frequent weeding and mulching. As the garden ages, the frequency will reduce because the growing plants will push out the weeds.