How to Build a Rain Garden
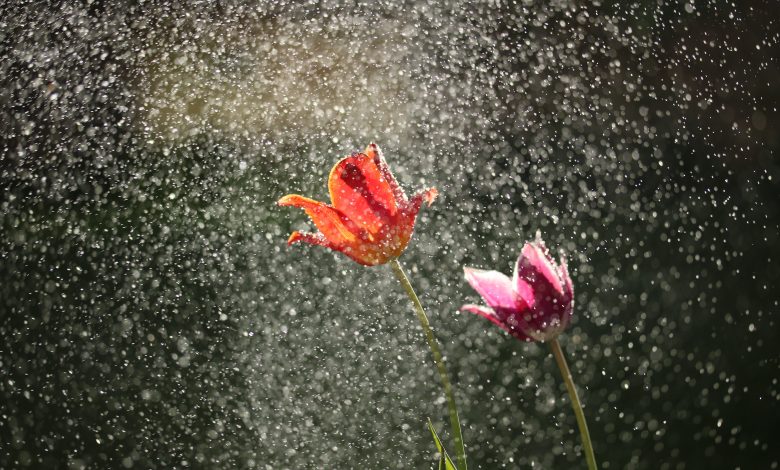
Building a rain garden is the perfect way to combat the destructive nature of water runoff. Instead of standing water flooding your yard or overflowing sewers, by creating a rain garden, you’re putting the water to work for you. In this article, you’ll read about how to build a rain garden, including what materials you’ll need, where it should be located, and how much it will cost.
During times of heavy rain, water can overwhelm modern drainage systems. With rainwater flowing out of downspouts, it can wash fertilizer and pesticides into our streets, where it eventually goes into a drain that feeds into our waterways. And when the sewage drains get so overwhelmed, they can dump sewage into rivers and bays. A rain garden alleviates these issues while providing you with a beautiful new landscape feature.
Rain gardens are perfect for urban areas where there is not much ground capable of absorbing water. By creating a rain garden, you’ll be helping to fix many of the drainage problems that plague big cities. While the benefit to the environment can be best felt in an urban area, rain gardens can still be charming and sensible in a suburban setting.
Rain gardens aren’t only beneficial for the environment and local utilities, but they’re also a benefit to your pocketbook. When you build a rain garden, you are constructing a self-sustaining habitat that can add value to your home while reducing your lawn care costs. Some areas even offer rebates if their residents install a rain garden.
Steps to Build a Rain Garden
- Find the ideal location for your rain garden.
- Test the ground to see how viable it is and how deep your garden should be.
- Call 811 to check for underground utilities.
- Figure out how big your rain garden should be.
- Dig out the garden and plan your zones.
- Bring on the plants!
A rain garden takes the rainwater that builds up on your roof and in your gutters and funnels it to a specific area where it will feed your garden. Sometimes building a rain garden will require you to move downspouts or to add additional tubing to the end of your downspout. But other times, your downspout is conveniently in a location conducive to a rain garden.
Where Should a Rain Garden be Placed?
The first consideration is that the rain garden must be in an area that can absorb water. The perimeter should also be at least ten feet away from your house. Ideally, you’ll have a viable location close to your downspouts, which will save you from having to lay extensive tubing to supply water to the garden.
To test the water absorption in a particular area, dig a hole one foot deep and fill it halfway up with water. You’ll want to do this early in the day because the absorption may take a while.
The next step is to time how long it takes for the water to absorb into the ground. If it takes 12 hours to drain six inches, your drainage rate is six divided by 12, which equals 0.5 inches per hour. Ideally, you’re looking for a rate higher than half an inch per hour.

How Deep Should a Rain Garden Be?
The depth of your rain garden will depend on the rate at which it absorbs water. If the absorption rate is above half an inch, your rain garden only needs to be 18 inches deep. If it’s below half an inch, though, you’ll have to go 30 inches into the ground for your garden. If the rate is below 0.1-inches per hour, the location is not viable.
Before You Dig, Call 811
The first step to take once you’ve identified the ideal location for your garden is to call 811 to have someone come out and check for underground utility lines. Within a few days, someone will come out to your house without disturbing you and mark where the utility lines are. If you happen to dig into a utility line without letting your municipality know, you can be on the hook for all the repair costs.
How Big Should My Rain Garden Be?
Your rain garden should be big enough to divide into three separate zones. The outermost zone is where you’ll put plants that thrive in drier conditions. In the middle zone will be plants that can handle standing water, but not all the time. The innermost zone is for the plants that do best in a water-soaked environment.
Typically, rain gardens range from 100 square feet to 400 square feet. A common rule of thumb is that your garden should be close to 20 percent of the size of the structure you’re draining from, whether that be a roof, pavement, or patio. But in general, feel free to start small with your layout. You can always expand your garden later if you’d like. If your location has particularly good drainage, you may be surprised at how well a small garden will do at handling all the water.
How Much Does it Cost to Build a Rain Garden?
On average, it costs about three to four dollars per square foot to build a rain garden. The costs will also be dependent on a variety of factors which include:
- If your native soil is viable to be used.
- How much piping is necessary to direct the flow of water.
- If you do it yourself or use outside help to build.
With typical rain gardens ranging between 100 and 400 square feet, the cost could be as little as $300 or as much as $1200.
How to Build a Rain Garden
Now that your site is picked out and you have confirmed that there are no utilities underneath, it’s finally time to build the garden.

What Materials do you Need for a Rain Garden?
Materials you will need on hand:
- Shovel
- Spade
- Wheelbarrow
- Hose
- Spray Paint
- Compost
- Mulch
Drawing the Perimeter
Using a hose, you can create the shape you’d like the garden to take. Once you’ve arranged the hose in a curved and creative shape, you can use the spray paint to mark the perimeter.
How to Dig Out Your Rain Garden
Next, you’ll use a spade to dig out the top layer of grass, and a shovel to dig it out. But you have a couple of alternatives for this step if you’d prefer not to do so much digging. You can rent a sod cutter for about $80 a day from a local hardware store, which will save you a lot of time if you’re building an especially big garden.
You also have the option of hiring a landscape contractor who can dig out the whole area with a mini excavator. Or, for about $230 a day, you can rent your own excavator—which could be a lot of fun if you’re feeling adventurous and have the extra cash.
You’re going to have extra soil leftover after you dig, even if you end up using it in your soil mixture. If you can’t repurpose the soil around the rest of your yard, you can build up berms on either side of the garden. Using raised berms can create more interest in your garden and can help you to separate the plants that need drier soil. Your berms should go no higher than six inches above the edge.
Laying Down Pipe
The last digging step is to dig out a canal for your inlet pipe. This pipe will run from your downspout and will bring the water into the garden. If you have two downspouts that can feed into the garden, you’ll want to do this for both. Where your pipe enters the rain garden, lay down a layer of gravel or stones which will help to prevent erosion.
A solid flat pipe will be the most durable, but corrugated pipes are often used and are both cheaper and easier to maneuver. You’ll likely need a downspout elbow to connect to the tubing if you don’t already have one. Downspout elbows cost around $15 each, and 3-inch diameter, 25-foot long tubing can cost around $90.

Laying Down Your Soil
Once the area is all dug out, bring in enough soil mixture to cover the entire area, leaving about least six inches of room on top. The soil mixture you’ll want to use should be two-thirds of your native soil if it is relatively free of clay, and one-third compost.
What Plants to Use in a Rain Garden
Now that you have the soil down, it’s finally time to add the plants. You’ll need to do your research to find the plants that will succeed in your three zones. You should be able to plant almost anything you’d like in the outermost zone, but the two inner zones will require specific native plants that do well with lots of water. A succulent, for example, would not do well in one of the inner zones.
After you’ve done all your plantings, laying down a layer of mulch will add to the attractiveness of the garden, as well as help to keep the weeds out. You also may want to add large boulders around the perimeter of the garden to maintain its integrity and add more detail, but this is completely up to you.
You Now Have a Self-Sustaining Rain Garden
Congratulations, you now have a self-sustaining rain garden that you can be proud of. You’ll want to weed your garden and add mulch when needed, but other than those two steps, your rain garden will run itself. Now it’s time to sit back, enjoy, and see if your township has any rebates for all of your hard work.
Read on for more on how to start a garden.