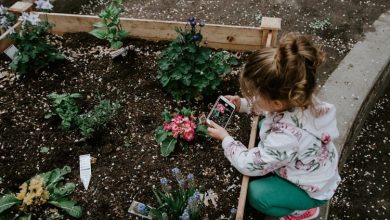
How Do I Build a Raised Garden?
Building a raised garden bed is one of those activities that you’ll wish you had done much sooner once it’s up and running. Flowerpots and planters are no substitute for the amount of food you can grow in a raised garden. By the time your garden is blooming with fresh fruits and vegetables, you’ll be ready to build the next raised bed to add even more plants to the mix. Deciding to build a raised garden is one of the most rewarding decisions you’ll make all year. But now the question becomes, how do I build a raised garden bed?
Below we’ll go over everything you’ll need to get your garden going. We’ll cover where to build your garden, the tools you’ll need, how to set it up, and how to maintain it.
How to Pick a Location for your Raised Garden
The first step towards building a raised garden is deciding where it will go and how large it will be. Two things your garden will need in abundance are water and sunlight. So if you’re going to be manually watering your garden, you’ll want to choose a sunny area that’s closest to your water spigot.
Now is an excellent time to take inventory of any hoses you have on hand. You don’t necessarily need a hose if you’re planning on watering from a pot you can carry. But having a long hose with a versatile spray attachment is going to be an investment well worth your money.
You want to pick an area of your yard that gets at least eight hours of sunlight per day. The more joyous rays of sunshine on your plants, the better.
The last step in choosing the location for your raised garden is finding an area that has enough flat ground to fit the size of your bed. During rainfall on uneven surfaces, the water runoff can cause erosion of roots. Finding a flat area is helpful because it ensures even water distribution and healthy roots.
How Big Should Your Raised Garden Bed Be?
Now that you’ve picked out the perfect spot for your garden, it’s time to start considering how big you want it to be. The first factor that will help you to determine the size of the bed is what you’re planning on growing.
In general, bigger is going to be better, so if you’re in between sizes, go for the bigger bed. The reason to go with a more prominent bed is that the plants in your garden need room to grow and often grow much more abundantly than you initially imagined.
For example, I recently put in a 4′ x 6′ raised garden rather than going with a 4′ x 4′ bed thinking I was choosing the more significant option. However, as soon as my cucumber and tomato plants started growing, they overtook the bed just by themselves. Their roots stunted the growth of nearby plants, and the broad leaves of these two plants also blocked sunlight from getting to the smaller vegetables I had planted next to them.
If I could do it all over, I probably would have gone with a 4′ x 8′ bed. Now, the good news is that you can always add another raised bed. But you can save yourself some time by opting for a bigger garden upfront.
In addition to the outer dimensions of the raised bed, you also must consider the depth of the bed. For deep-rooted plants like tomatoes and berry bushes, you’ll want a deeper bed to ensure that the roots have enough room to grow.

Should I Buy a Garden Bed Kit or Make My Own?
At this point, you’ve picked out where your raised garden is going and how big it will be. Now, it’s time to decide if you’re going to buy a raised garden kit that comes with everything that you’ll need to build your garden, or if you want to create the bed on your own. Buying a raised garden kit could cost around $100 on the low end, and between $200 and $400 for a higher quality product.
How to Build Your Own Raised Garden Bed
If you opt to build the bed on your own, you can save yourself a lot of money, but you’ll need to be sure to buy the proper building materials that will work best in a garden. For example, you should look for untreated wood to prevent chemicals from seeping into the soil. But with untreated wood, you put a life span of two to five years on your bed. An attractive alternative is to look for a natural protective oil that you can use to defend the wood from the elements. By applying natural protective oil once a year, you can keep your garden bed looking nice while increasing its longevity.
Here’s everything you’ll need to build your raised garden:
- A cordless drill
- Countersink bit for pre-drilling holes
- Untreated wooden boards
- 3-inch deck screws
- A protective bottom layer
Pre-drilling your holes will help ensure that the wood doesn’t crack or splinter when you start drilling. And a countersink bit helps to maintain the integrity of the wood while providing a flush finish for your screw.
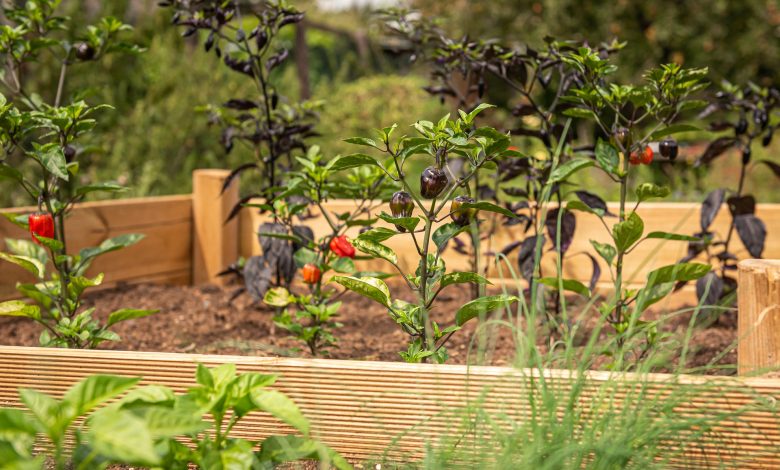
Let’s say you want to build a 4’ x 8’ bed. A recommendation for the wood you want to buy would be three 2x10x8 wooden boards. These are two inches deep across the top, ten inches tall, and eight feet long. Two of the boards will form the long sides of your bed, while the third will be cut in half and used on the shorter sides of the bed. Your local hardware store should be able to cut everything to size for you.

Putting Together your Raised Garden Bed
Arrange your sideboards on the ground with the four-foot sides flush against the inside of the eight-foot sides. Line up your drill along the top end of an eight-foot board and center it to make a hole going into the edge of the four-foot board. Now, pre-drill four holes going vertically down for extra stability. Next, holding the shorter board with one hand to keep it flush, start drilling in your screws. Repeat this step on each corner.
If you want to add extra support, you can buy 2×4 scrap pieces of wood and line them up on the inside corners of the bed for additional strength, which will help prevent the wood from bowing out. Additionally, you can put 2×4 wood planks on top of the perimeter of the bed to use as a railing that you can sit on to reach into the middle.

Should I Use a Protective Bottom Layer on My Raised Garden Bed?
You now have the choice to put your soil mixture straight on the ground or to use a protective layer to separate your soil mixture from the rest of the earth. The reason for using a protective layer between the soil is to keep weeds and grass from competing with your new roots.
If you know you have high-quality soil already in the ground, you can skip the protective layer. But to play it safe, it’s recommended that you put down this new membrane which will allow water to seep through but will keep out competing elements.
A low-cost and highly effective option is to lay down cardboard boxes under your bed. Cardboard will have the same effect as fancy landscape fabric and won’t cost you a dime if you have some old boxes lying around. The under-appreciated aspect of cardboard is that it’s effective at keeping out the weeds, but it also allows worms to crawl into the bed. Worms are helpful little creatures that break down the soil and add air and water to the mixture. When they eat, they act as a natural fertilizer, and worms enjoy eating the cardboard.
What you don’t want in your garden are underground pests such as moles, gophers, or voles. These little beasts will kill your plants from the ground up by eating their roots. If you think you have critters in the area, you can put a layer of chicken wire down as the last layer of protection.
What’s the Best Soil Mixture for a Vegetable Garden?
Now that your boards are all put together, and you’ve chosen your protective layer, it’s time for the most critical step: your soil mixture. The main reason for having a raised garden bed in the first place is being able to choose a specialized blend of soil, rather than relying on the earth that’s currently in your yard.
This step is the most essential aspect of building your garden, as it directly affects how well your plants will grow. Many times, people just put down a load of potting soil to fill their raised beds. But getting lazy with this step will cost you in the long run. Potting soil is a quality composting material, but it does not retain moisture well. If you use only potting soil, you’ll end up wasting a lot of water, while also drying out your plants and stunting their growth potential.
Instead, do some research on the best soil mixtures for the types of plants you want to grow. For example, if you’re growing tomatoes, your garden will benefit from slightly acidic soil. If you’re growing greens, you’ll want to keep the soil low in nitrogen. There are endless ways to blend the perfect soil, and what works best for you will be determined by your local climate and the plants you want to grow.
In general, a simple blend of soil to create will include your local topsoil along with compost and a touch of potting soil. A recommended mix is 60-percent topsoil, 30-percent compost, and 10-percent potting soil. Many organic gardeners will create their own compost, but if you don’t have a compost pile actively building, you can buy a compost mixture at any hardware store or garden nursery.

Now It’s time to Plant Your Garden
At this point, you should have your bed put together and your soil mixture down. Now it’s time to plant. The easiest way to get your garden up and running is to head out to a local garden nursery and buy pre-grown plants that are ready to put their roots down in your garden. If you don’t have time to drive out to a nursery, or would rather do everything on your own, you can buy seeds online or at your local grocery store.
Whatever you choose, make sure to water your garden daily. Your plants don’t need much attention, but they require eight hours of sunlight and lots of water to reach their full potential. Follow these steps, and you’ll have a bountifully blooming garden delivering fresh food to your table.